Modern App Development with Pivotal Cloud Foundry and Joget Workflow
Cloud Foundry is an open source platform as a service (PaaS) for developers to deploy and scale applications without manually configuring and managing servers. The promise of “write once, run anywhere” means developers can build their apps on a programming language or framework of their choice, and be able to deploy it to any underlying cloud environment.
For example, developers could code a Java-based Spring Framework application, and “push” the application to a Cloud Foundry space. That space could be running in an on-premises OpenStack cloud, or a public cloud like Amazon AWS, Google Cloud Platform, IBM Bluemix or Microsoft Azure. The idea is that it hides away infrastructure details and services such as databases, so developers do not need to worry about managing the underlying environment.
Originally developed by VMWare, the Cloud Foundry project was owned by its spin-off Pivotal before being transferred to the Cloud Foundry Foundation, which is backed by major technology companies such as Dell EMC, Google, HPE, IBM and SAP. In addition, there are many prominent end user members such as American Airlines, Fidelity, Ford, Home Depot and Volkswagen. Half of the Fortune 500 now use Cloud Foundry in some form or another, as it aims to be the global industry standard cloud technology for the enterprise.
The Cloud Foundry platform is available from either the Cloud Foundry Foundation as open source software, or as a commercial product or service from multiple providers. Pivotal Cloud Foundry (PCF) is a commercial offering from Pivotal.

As an open source low code platform to visually build enterprise web apps for coders and non-coders, Joget Workflow is a good complement for Cloud Foundry.
In recent years, the emergence of low code platforms has greatly expedited software development and delivery to meet customer needs and demands. Instead of taking months in traditional enterprise development, apps can now be built in a fraction of the time, even just minutes for working prototypes.
Deploy Joget Workflow on Pivotal Cloud Foundry
In this example, we will deploy Joget Workflow on PCF Dev from Pivotal. PCF Dev is a lightweight, easy to install distribution of Cloud Foundry designed to run on a developer machine, making it easier to locally develop, test and explore Cloud Foundry.Note: The following steps are summarized from the Joget Knowledge Base. For more detailed information please refer to the Joget Workflow on Cloud Foundry article.
Step 1: Install PCF Dev
Install PCF Dev according to the instructions in the Pivotal Documentation.
Once installed, start PCF Dev using the command
cf dev start
Follow the instructions provided at the end of to connect to PCF Dev, by logging in using the admin user and choosing the pcfdev-org organization:
cf login -a https://api.local.pcfdev.io --skip-ssl-validation
Step 2: Create MySQL Database Service
In Cloud Foundry, all external dependencies such as databases, file systems and so on are considered services. Cloud Foundry allows administrators to provide a marketplace of services, from which users can provision reserved resources on-demand.
Here, we will create a MySQL Database Service.
In the command line, search the marketplace for MySQL plans available.
cf marketplace -s p-mysql
Create a service instance with the 1gb plan with the name jogetdb:
cf create-service p-mysql 1gb jogetdb
More detailed information can be found at https://pivotal.io/platform/pcf-tutorials/getting-started-with-pivotal-cloud-foundry-dev/connect-a-database
Step 3: Create Local Volume Service
In Cloud Foundry, a volume service provides a reliable, persistent file system.
Create a service instance using the PCF Local Volume Service with the name jogetdata:
cf create-service local-volume free-local-disk jogetdata
More detailed information can be found at https://docs.cloudfoundry.org/devguide/services/using-vol-services.html and https://github.com/cloudfoundry/local-volume-release
Step 4: Download and Deploy Joget Workflow WAR
Download Joget Workflow from https://www.joget.org/download/Install Joget Workflow https://dev.joget.org/community/display/KBv6/Installing+Joget
Look for the Joget Workflow WAR file jw.war in joget_installation_directory/apache-tomcat/webapps
Push the WAR to the Cloud Foundry space with a memory allocation of 1G and application name joget:
cf push joget -p joget_installation_directory/apache-tomcat-8.5.23/webapps/jw.war -m 1G --no-start
Note that we use the --no-start parameter to delay the start of the application, because we need to set a couple of environment variables before starting up.
Note that we use the --no-start parameter to delay the start of the application, because we need to set a couple of environment variables before starting up.
Step 5: Configure and Start Joget Workflow
Set the Apache Tomcat context path to /jw:
cf set-env joget JBP_CONFIG_TOMCAT '{tomcat: {context_path: "/jw"}}'
Next, disable the Spring auto reconfiguration. This is because the Joget Workflow WAR already performs the necessary initialization at startup, and the auto configuration will interfere with it:
Next, disable the Spring auto reconfiguration. This is because the Joget Workflow WAR already performs the necessary initialization at startup, and the auto configuration will interfere with it:
cf set-env joget JBP_CONFIG_SPRING_AUTO_RECONFIGURATION '[enabled: false]'
Bind the local volume service to mount the persistent filesystem to the Joget data directory:
Bind the local volume service to mount the persistent filesystem to the Joget data directory:
cf bind-service joget jogetdata -c '{"mount":"/home/vcap/wflow"}'
cf bind-service joget jogetdb
Verify that the services are bound to the Joget application:
cf services
For example the output shows the services bound to the joget application:
For example the output shows the services bound to the joget application:
name service plan bound apps last operation
jogetdata local-volume free-local-disk joget create succeeded
jogetdb p-mysql 1gb joget create succeeded
Start the Joget application:
cf start joget
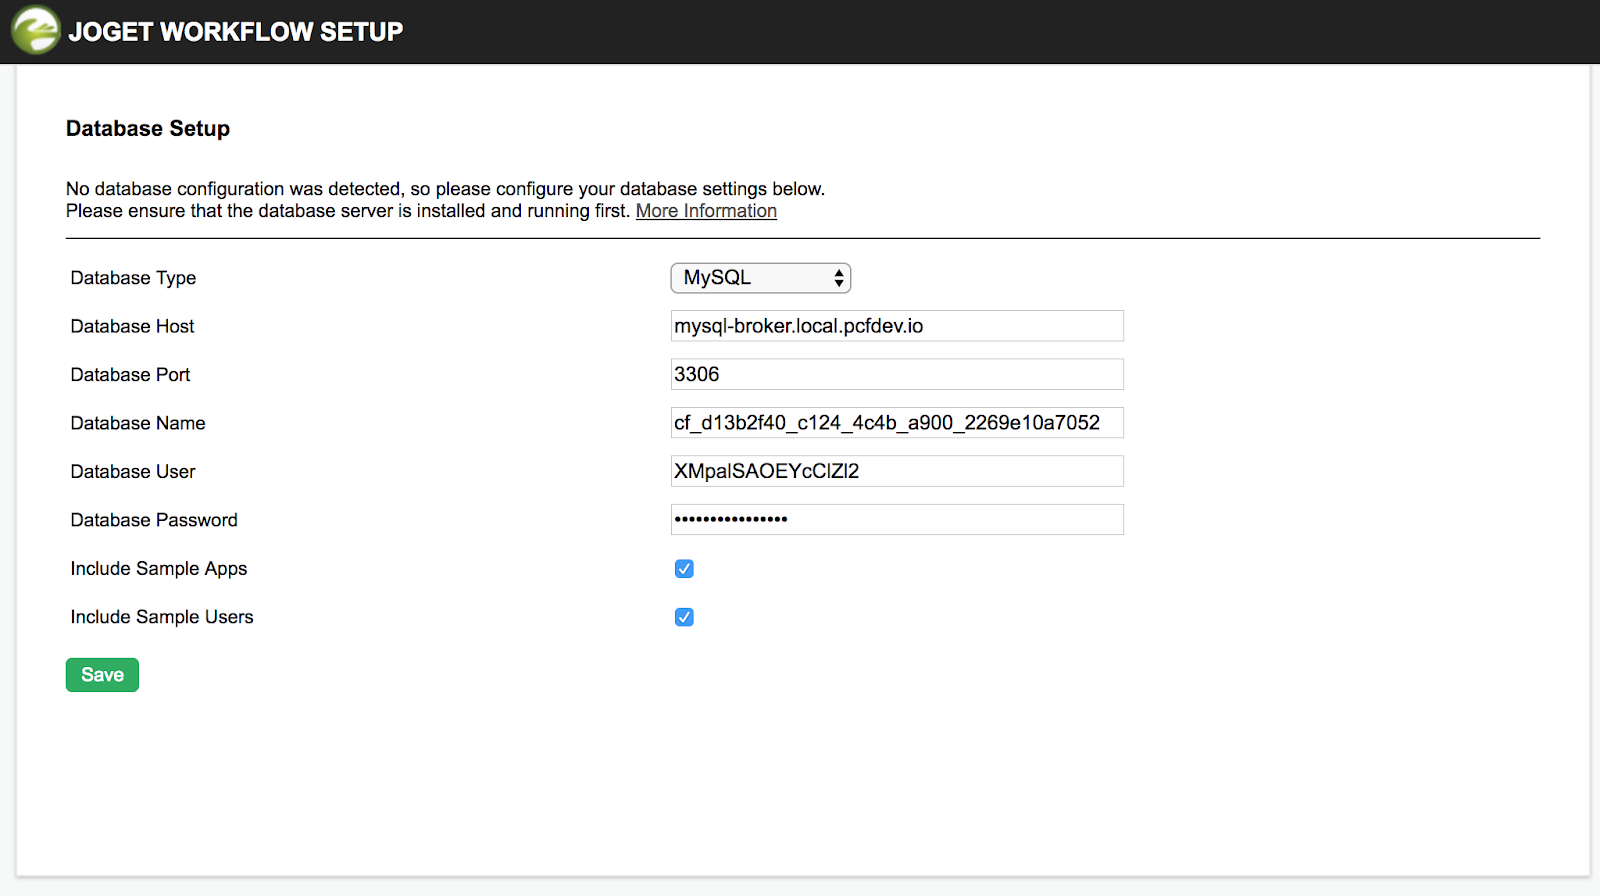
Step 6: Setup Joget Workflow Database
Now that the Joget Workflow platform has been deployed in Cloud Foundry, the final step is to setup the database schema, based on https://docs.cloudfoundry.org/devguide/services/migrate-db.html#single-migration.At this point, we can obtain the MySQL database service credentials by viewing the environment variables:
cf env joget
In particular, note down the p-mysql service hostname, port, name, username and password.
In particular, note down the p-mysql service hostname, port, name, username and password.
Access Joget Workflow at http://joget.local.pcfdev.io/jw/ and you will be presented with the database setup page.
Proceed to setup the database according to the instructions at https://dev.joget.org/community/display/KBv6/Setting+Up+Database.
Once setup is complete, you will be brought to the Joget Workflow App Center.
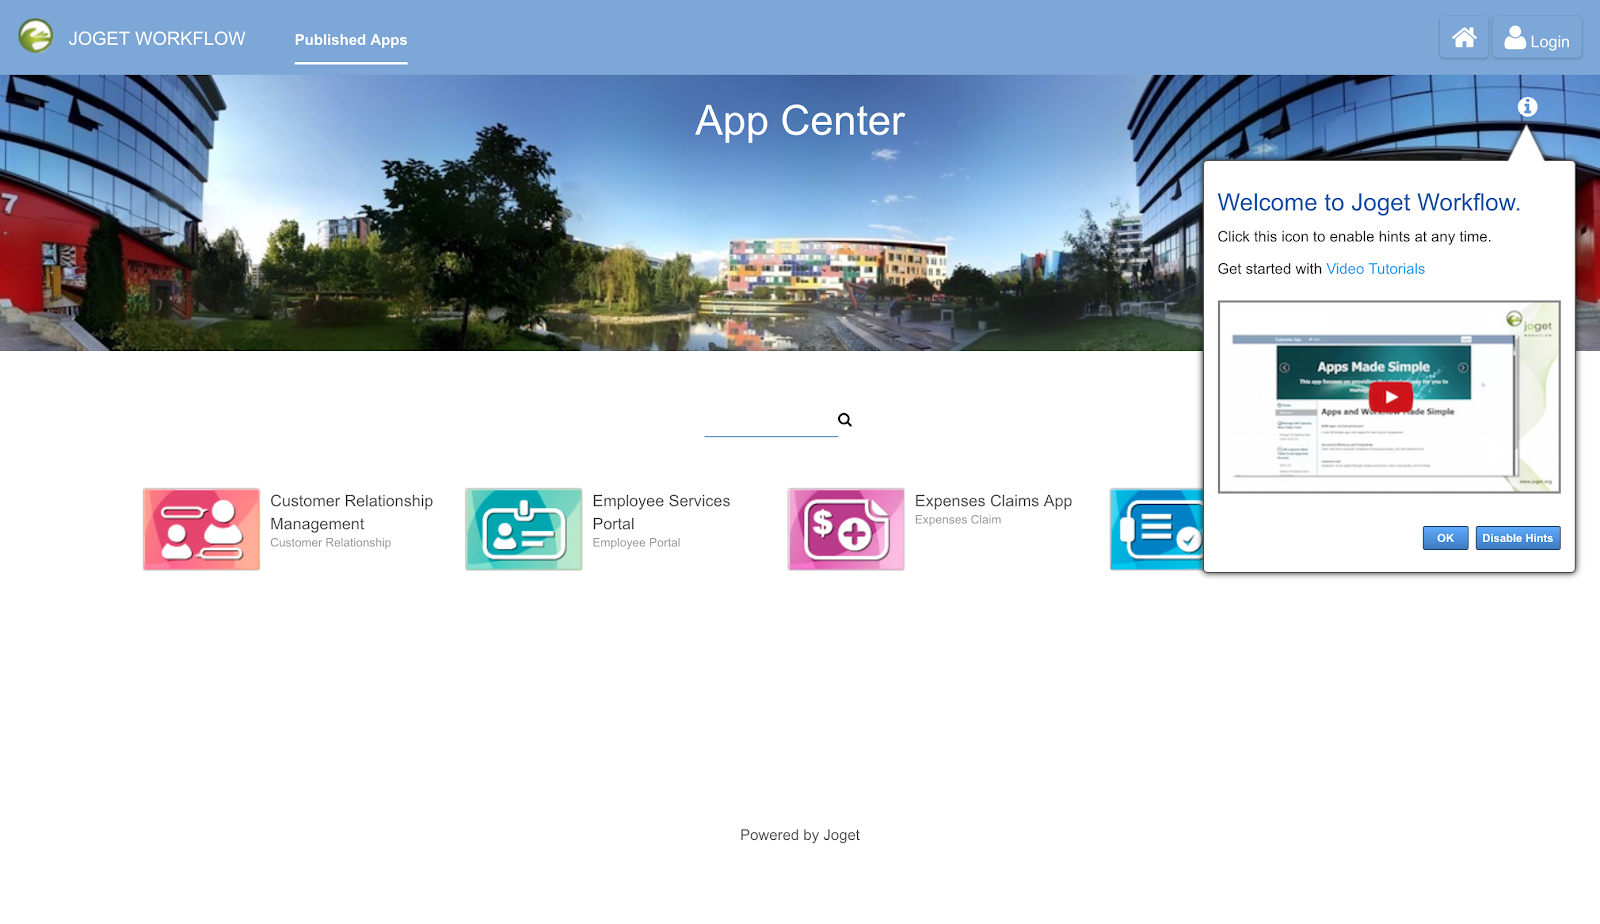
Build a Complete App in 30 minutes, No Code!
With the Joget Workflow platform up and running, it is now possible to build a full-fledged app running on Cloud Foundry with dashboards, calendar, approval workflow and data management within 30 minutes. And, it can be done without coding and you essentially drag-and-drop, point-and-click and configure your way through instead. It’s also possible to use your touch device to build it.
Watch the 30 minute video below, which demonstrates an authentic, real-time example of building the app from scratch.
To get started with Joget Workflow:
- Visit the Joget Workflow product page
- Learn with the Getting Started Guide in the Knowledge Base.
- Learn via the Joget Academy.


Comments
Post a Comment