Robotic Process Automation and Low-Code: A Quick Introduction, with a Practical Tutorial on Integrating UiPath with Joget
EDITOR’S NOTE October 2020: This post was originally published in June 2019 for UiPath Studio 19.5. Please refer to the Knowledge Base for the latest UiPath Studio 20.10, which provides a much simplified sign in and first run experience compared to previous releases.
This will be followed by a practical tutorial on getting started with leading RPA platform UiPath and how it integrates with the Joget open source no-code/low-code application platform. The tutorial will be presented in 3 parts:


- Part 1: Get Started with UiPath
- Part 2: Get Started with Joget
- Part 3: Integrate UiPath with Joget
Introduction to RPA
What is Robotic Process Automation (RPA)?
Robotic Process Automation (RPA) is a form of business process automation which deploys “robots” or software agents that mimic how users interact with computers. These robots are programmed or configured to manipulate a user interface (UI) instead of humans. Modern RPA platforms include artificial intelligence (AI) and machine learning capabilities to handle high-volume, repeatable tasks and transactions. For example, an RPA robot can log into an application, enter data, perform some calculations, complete some tasks and then log out.
How is RPA Different from Macros or Scripting?
At this point, you might be thinking that this sounds familiar. Aren’t these similar to old-school macros (for example like those used in Microsoft Excel), scripting, screen scraping or desktop recording? In a sense yes, but you could think of RPA robots as next generation macros that are extended for enterprise use. For example:
- RPA platforms can manage, monitor and audit robots on an enterprise-wide scale, as opposed to old desktop based approaches that only work on single machines.
- RPA robots can execute autonomously and interact with multiple applications at a time, instead of being bound within a specific application.
- RPA robots can incorporate AI and machine learning to adapt and even handle exceptions.
More information on differences can be found at https://www.uipath.com/blog/whats-the-difference-between-robots-and-macros and
Why Use RPA and How it Complements Low-Code Application Platforms
There are many benefits when implementing an RPA platform, for example:
- Allows existing processes to be completed more rapidly and efficiently
- Creates cost savings for manual and repetitive tasks
- Reduces errors and ensures more predictable processing times to comply with regulations and standards
In your company’s digital transformation strategy, there will be scenarios where RPA plays a crucial role. However, it is important to understand that RPA is not ideal for all situations, and cannot replace human resources completely. RPA works best for repeatable processes, especially in cases where it is too difficult or too costly to migrate from legacy software and systems. It is not so much changing existing business processes, but rather making them more efficient through automation.
But what happens if, for example, your legacy systems cannot provide enough features or is not stable enough to support your current and future needs? In many cases it is critical to modernize the way the business operates, thus making it necessary to replatform. Replatforming means redeveloping software applications on a modern platform as old legacy systems are no longer tenable.
This is where low-code application platforms come in as an ideal complement to RPA. Low-code platforms like Joget provide a way to visually and rapidly build enterprise web apps and reengineer business processes. So ideally, you would have the best of both worlds, where these new low-code apps work with RPA to integrate with legacy and external systems. The new apps can introduce transformed and more optimized business processes, while integrating with RPA robots to automate existing business processes.
Tutorial Part 1: Get Started with UiPath
UiPath Overview
UiPath is one of the leading RPA vendors, having been recognized as a leader in “The Forrester Wave™: Robotic Process Automation, Q2 2018” report.
UiPath consists of 3 main components:
 |
| UiPath Component Architecture |
- UiPath Studio: UI tool to visually design the process to automate
- UiPath Orchestrator: Web application that manages the creation, monitoring, and deployment of all robots and processes
- UiPath Robot: Runs processes that were built in UiPath Studio. Execution agent that is installed and executed in the actual machine.
So in a nutshell, this is how it works:
- Visually design a process using UiPath Studio in a developer PC,
- Publish/deploy the process to UiPath Orchestrator to be managed, scheduled and monitored.
- The actual process itself is executed by the UiPath Robots installed in the respective machines.
UiPath Concepts and Terms
Here are some of the basic concepts and terms in UiPath that you should get familiar with for the tutorial later:
- Machine: Represents the actual machine the robot executes in
- Environment: An environment is a grouping of Robots, that is used to deploy processes
- Package: A UiPath Studio project that is published
- Process: A process represents the association between a package and an environment. Each time a package is deployed to an environment, it is automatically distributed to all machines that belong to that environment.
- Job: A job is the execution of a process on one or multiple Robots.
There are other concepts for more advanced usage that will not be used in the tutorial, such as:
- Library: A process library describes a system of activities that are reusable for sharing
- Schedule: Enables jobs to be executed in a preplanned manner
- Asset: Usually represent shared variables or credentials that can be used in different projects.
- Queue: A place to store multiple types of data, such as invoice information or customer details.
Step 1: Sign Up for UiPath Cloud Platform
Let’s sign up for an account at https://www.uipath.com/platform-trial. There is a Community plan to get started for free, so we’ll Choose Community to register.
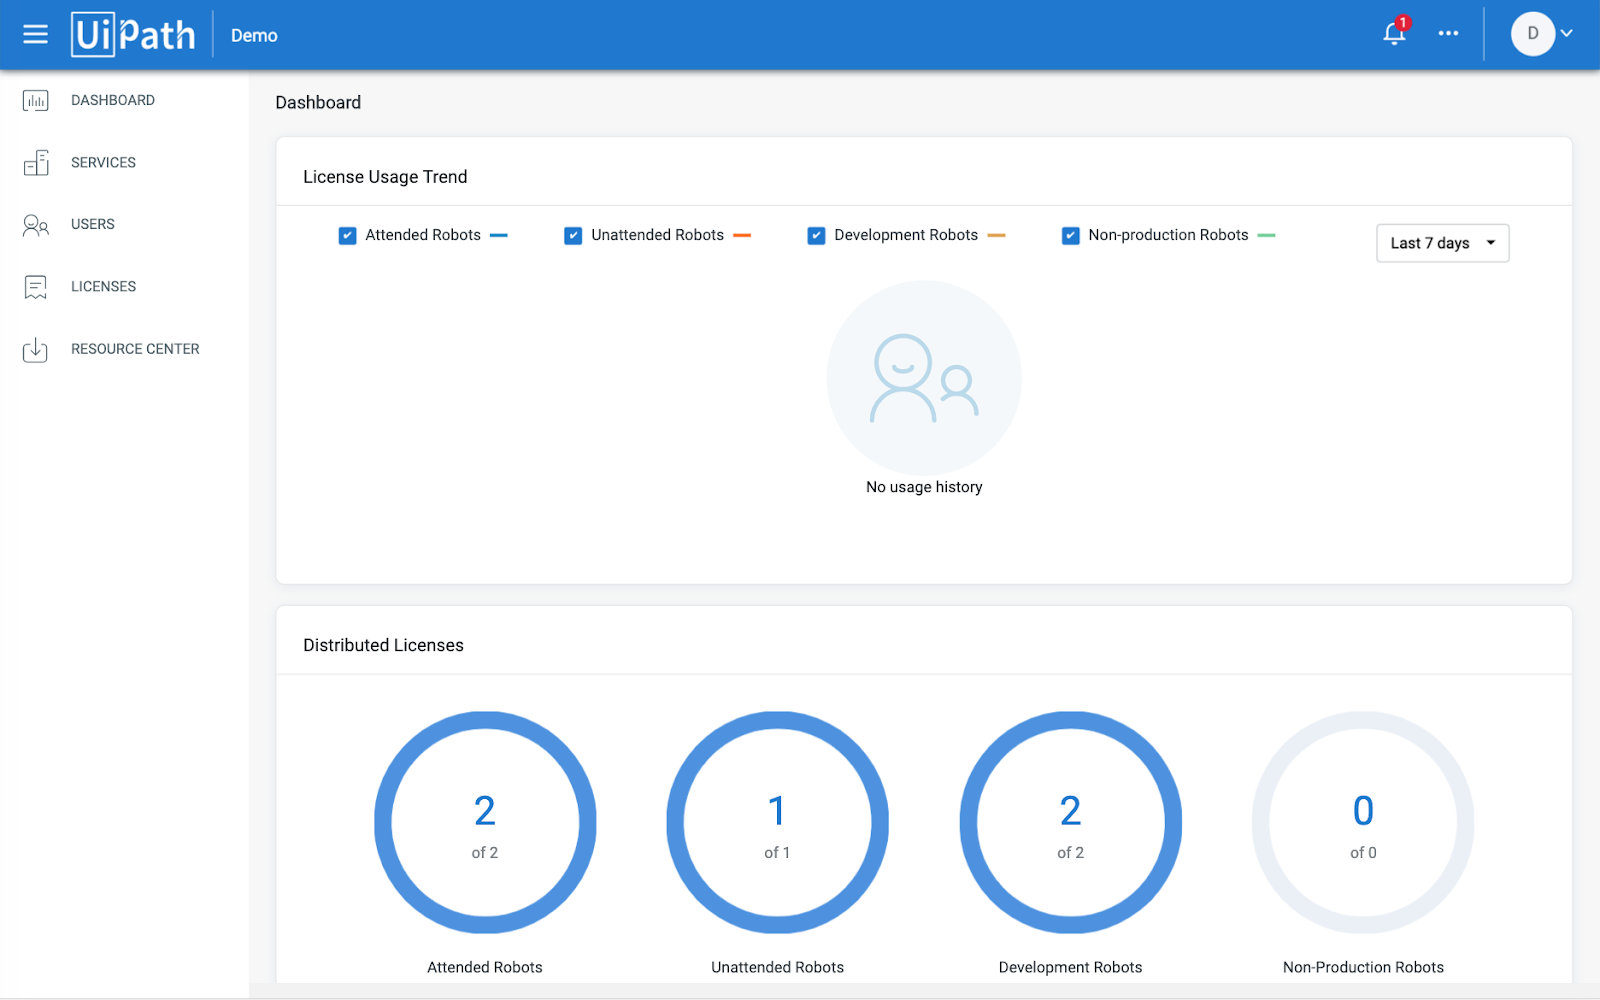
Sign up using a social account or an email, and upon registration you will be taken to a dashboard at
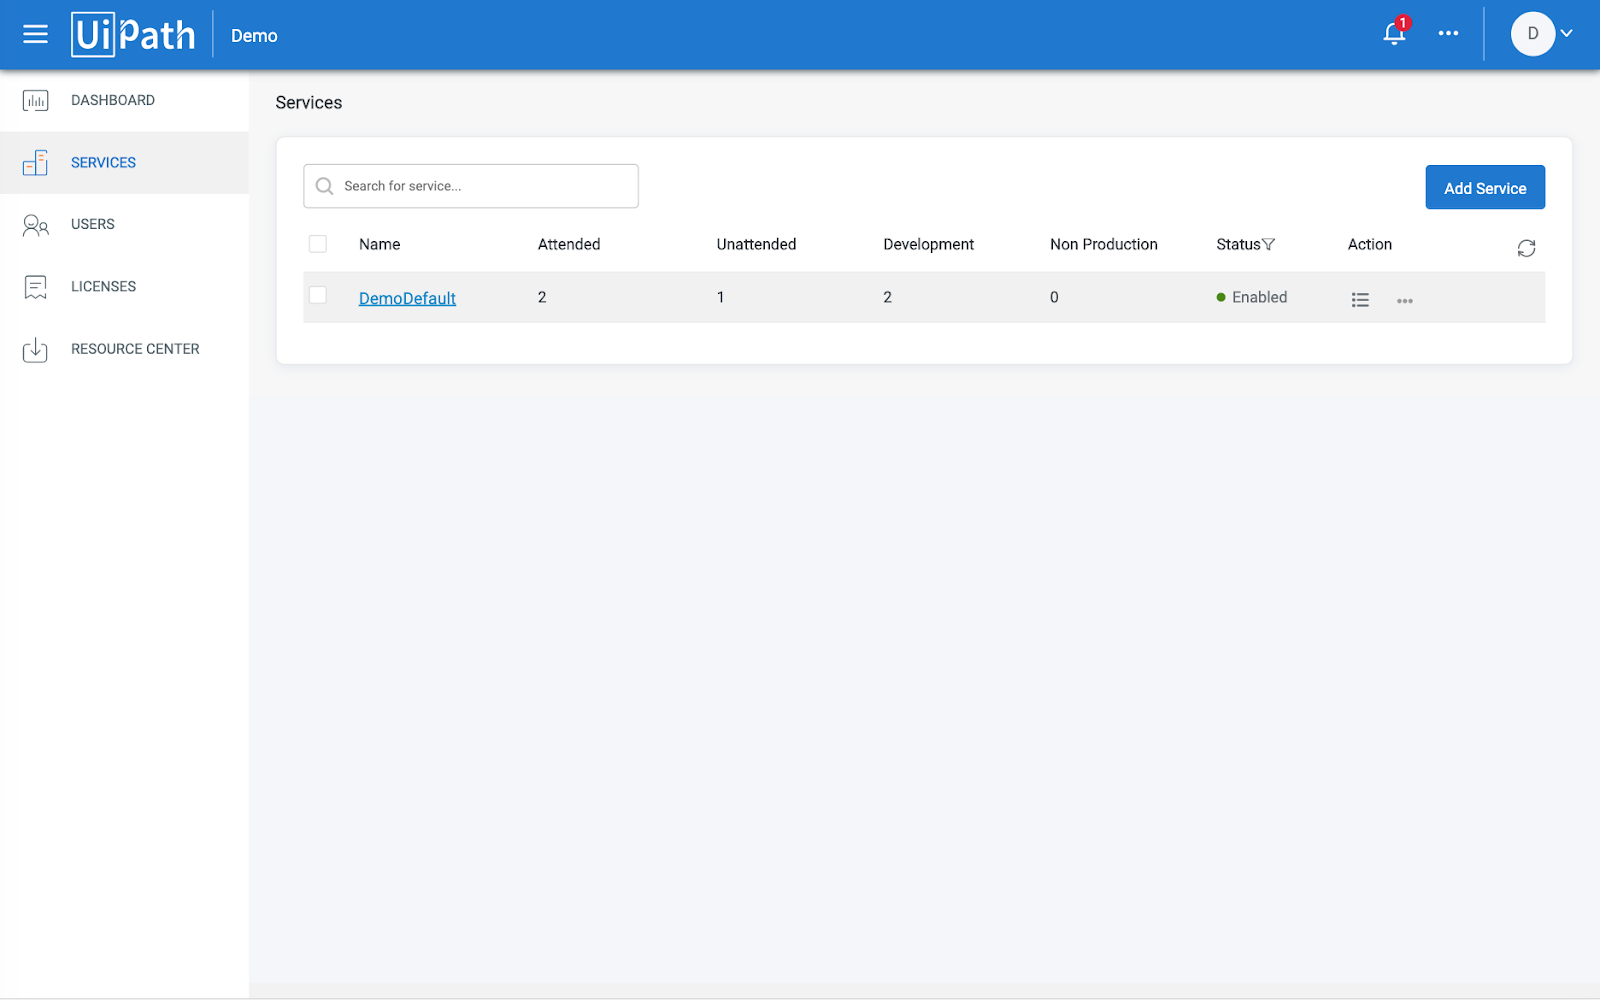
A service represents a deployment in the company. A default service is already created e.g. DemoDefault.
Select the service name to open the UiPath Orchestrator web application.
Step 2: Install UiPath Studio and UiPath Robot
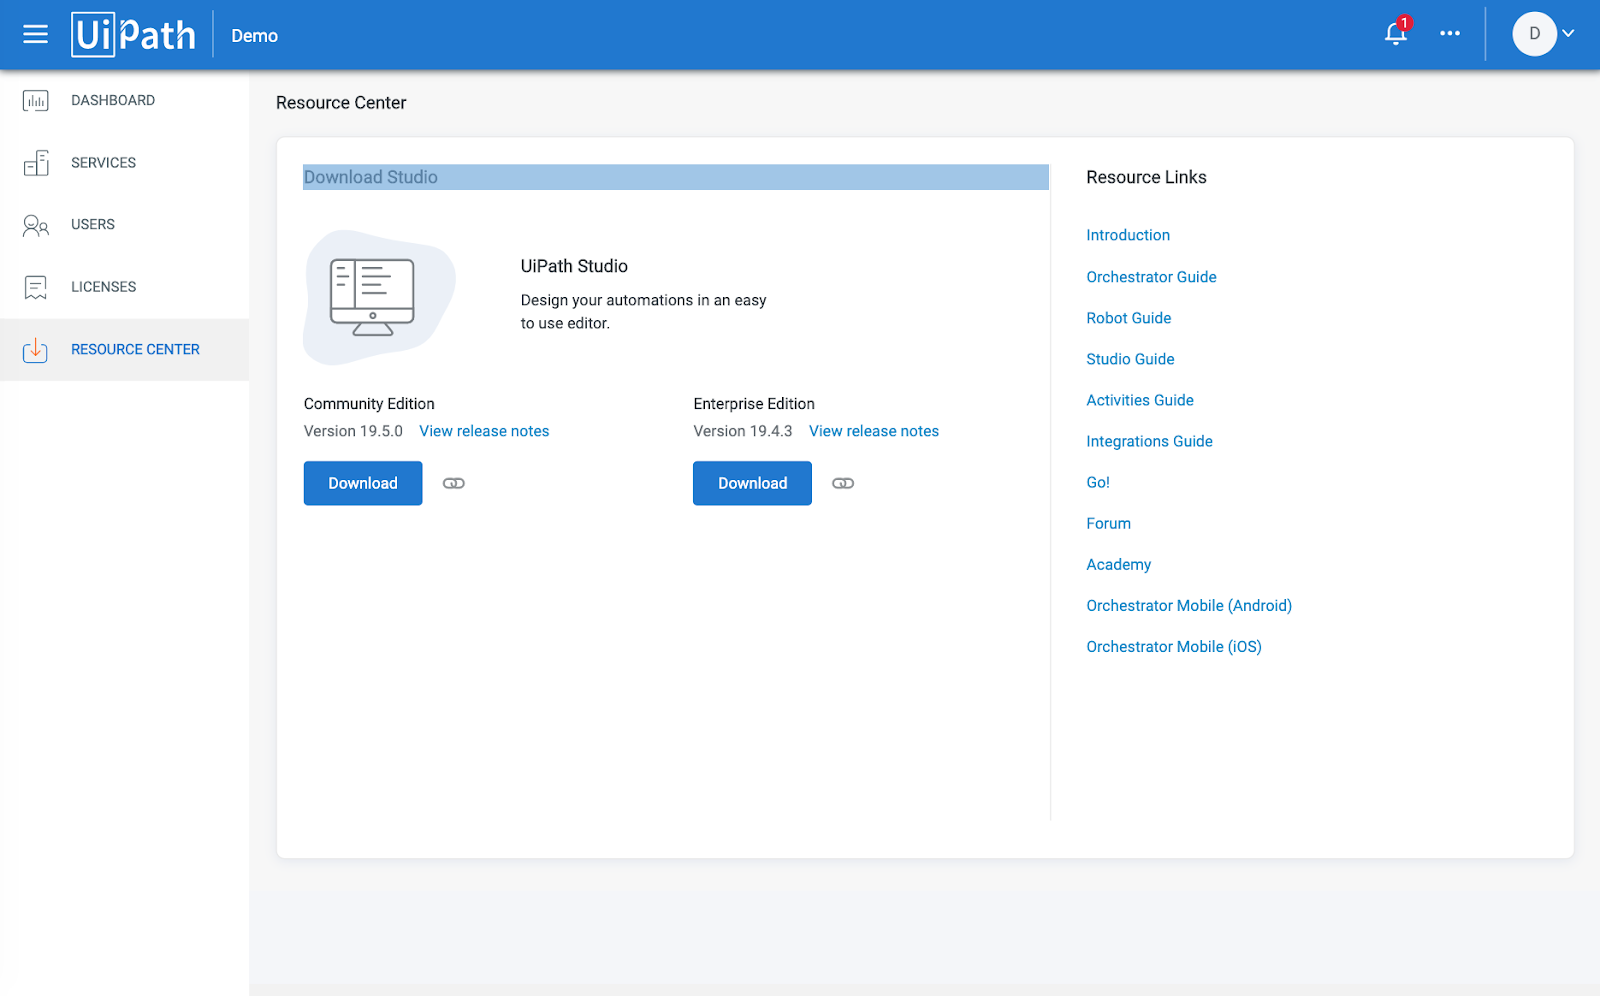
Download the UiPath Studio installer (UiPathStudioSetup.exe) from the Resource Center, and install it on the target computer. More information on UiPath Studio is available at the UiPath Studio Guide.
After installing UiPathStudioSetup.exe, start UiPath Studio from the Windows Start menu and activate it. You can start free by activating the Community Edition.
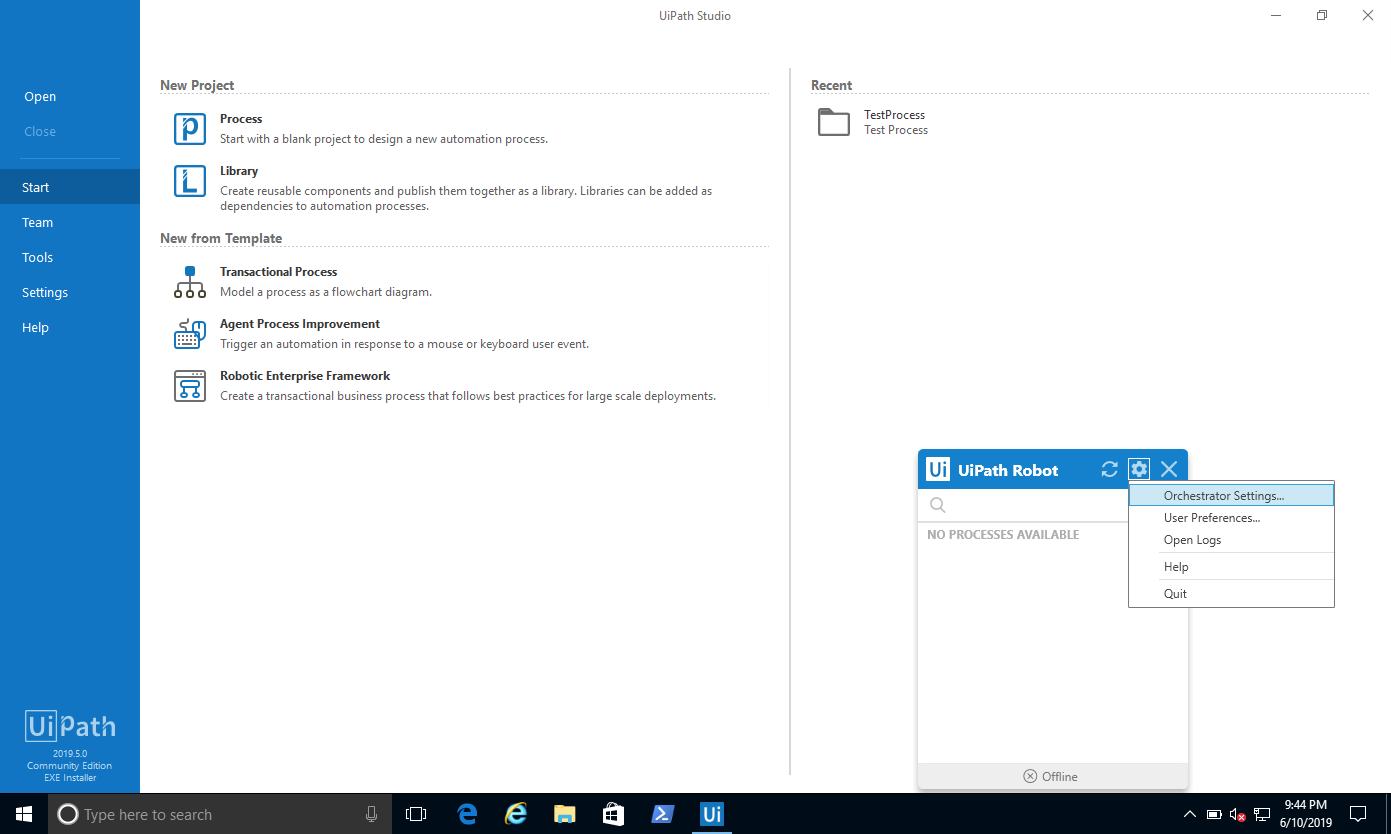
Step 3: Launch UiPath Robot and Obtain Machine Name
In the Windows Start menu, search for UiPath Robot and start it
Click on the Gear icon to open the Orchestrator Settings window, and copy the Machine Name.
Step 4: Obtain Machine Key
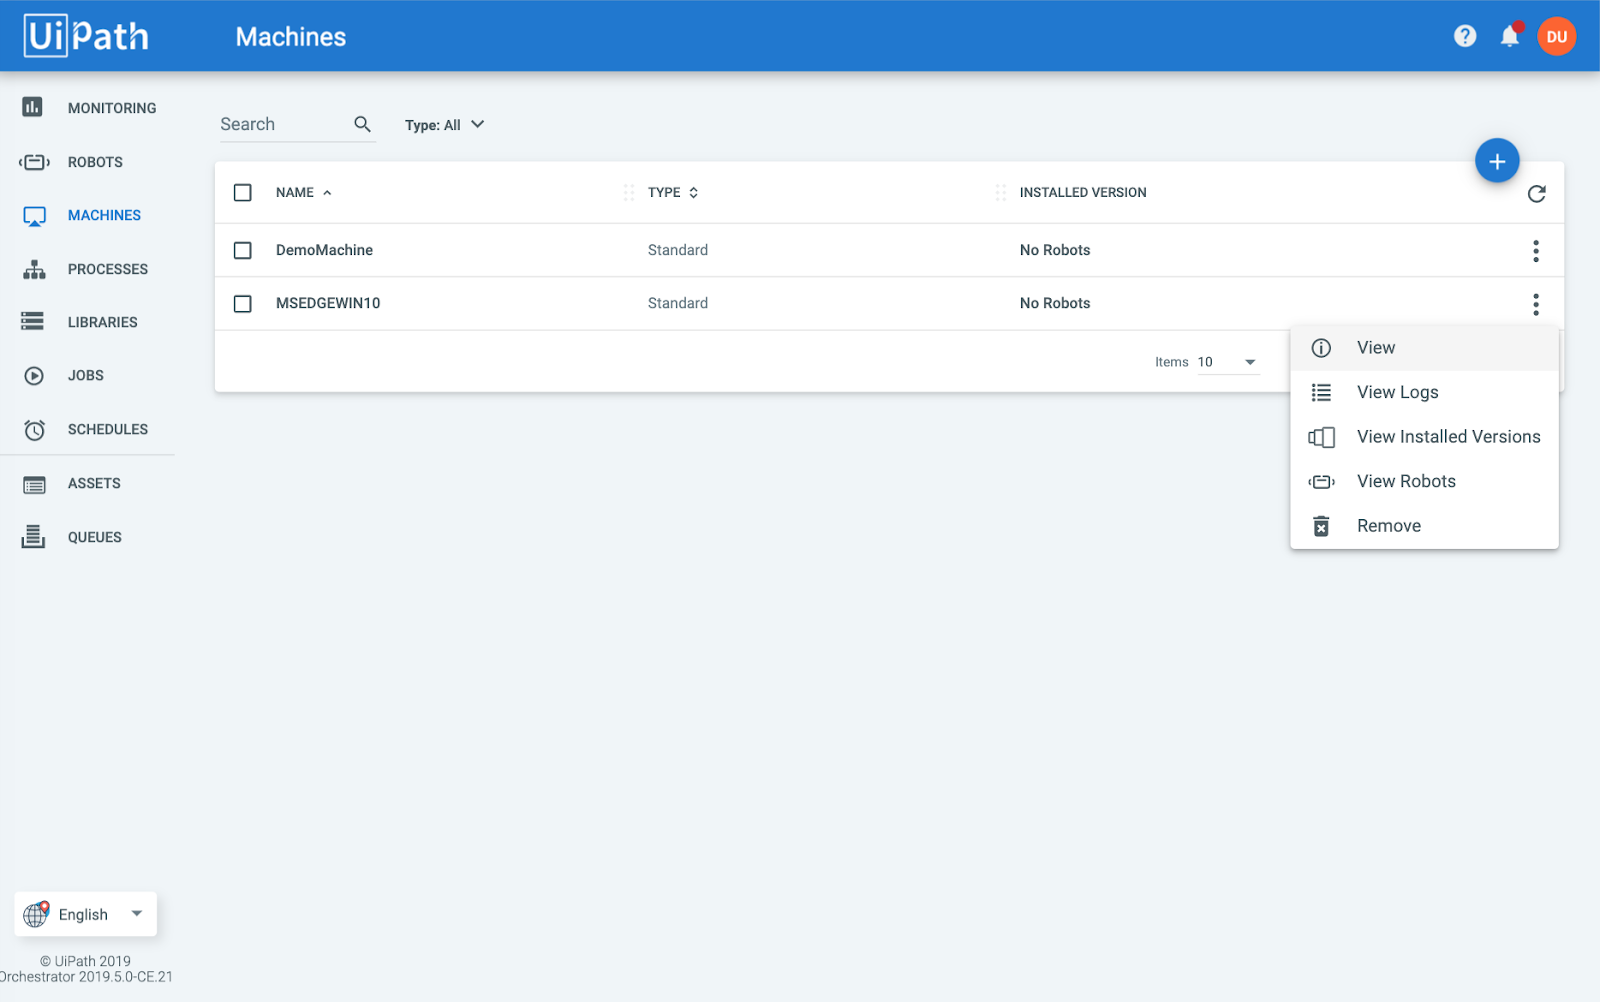
Back in the UiPath Orchestrator, create a new Machine under the Machines menu.
IMPORTANT: Make sure that the name matches the Machine Name shown in the UiPath Orchestrator Settings earlier.
View the selected Machine and copy the Machine Key.
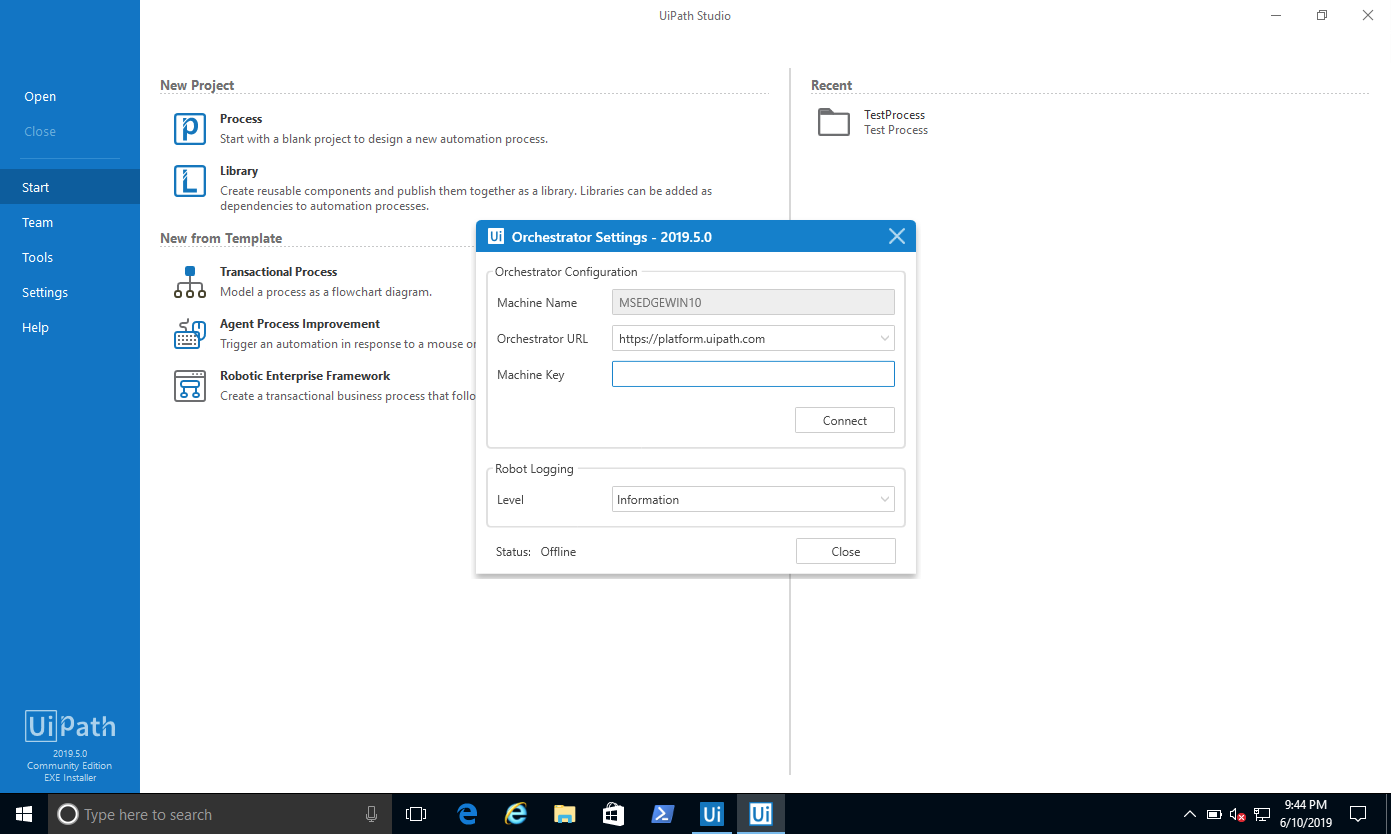
Step 5: Connect UiPath Robot to the Machine
In the UiPath Robot, click on the Gear icon to open the Orchestrator Settings window.
Fill in the Orchestrator URL (https://platform.uipath.com for the UiPath Cloud Platform) and the Machine Key copied in the previous step, then click on Connect.
Once connected, you should see “Status: Robot unavailable” at the bottom of the window.
Hover over that message, and you should see the reason “Robot is not available.” This message means that the machine connection is valid, so now it’s time to create a robot. If you see a different reason then there might be an error in your configuration so you will want to double check your settings.
Step 6: Create a Robot
In the UiPath Orchestrator under the Robots menu, click on the Plus icon on the top right.
Choose “standard robot that works on a single standard machine”.
Assign the robot to the machine created previously.
Set a “Name”, and fill in the actual Windows login for the target machine (where the UiPath Robot is installed) under Domain\Username and Password.
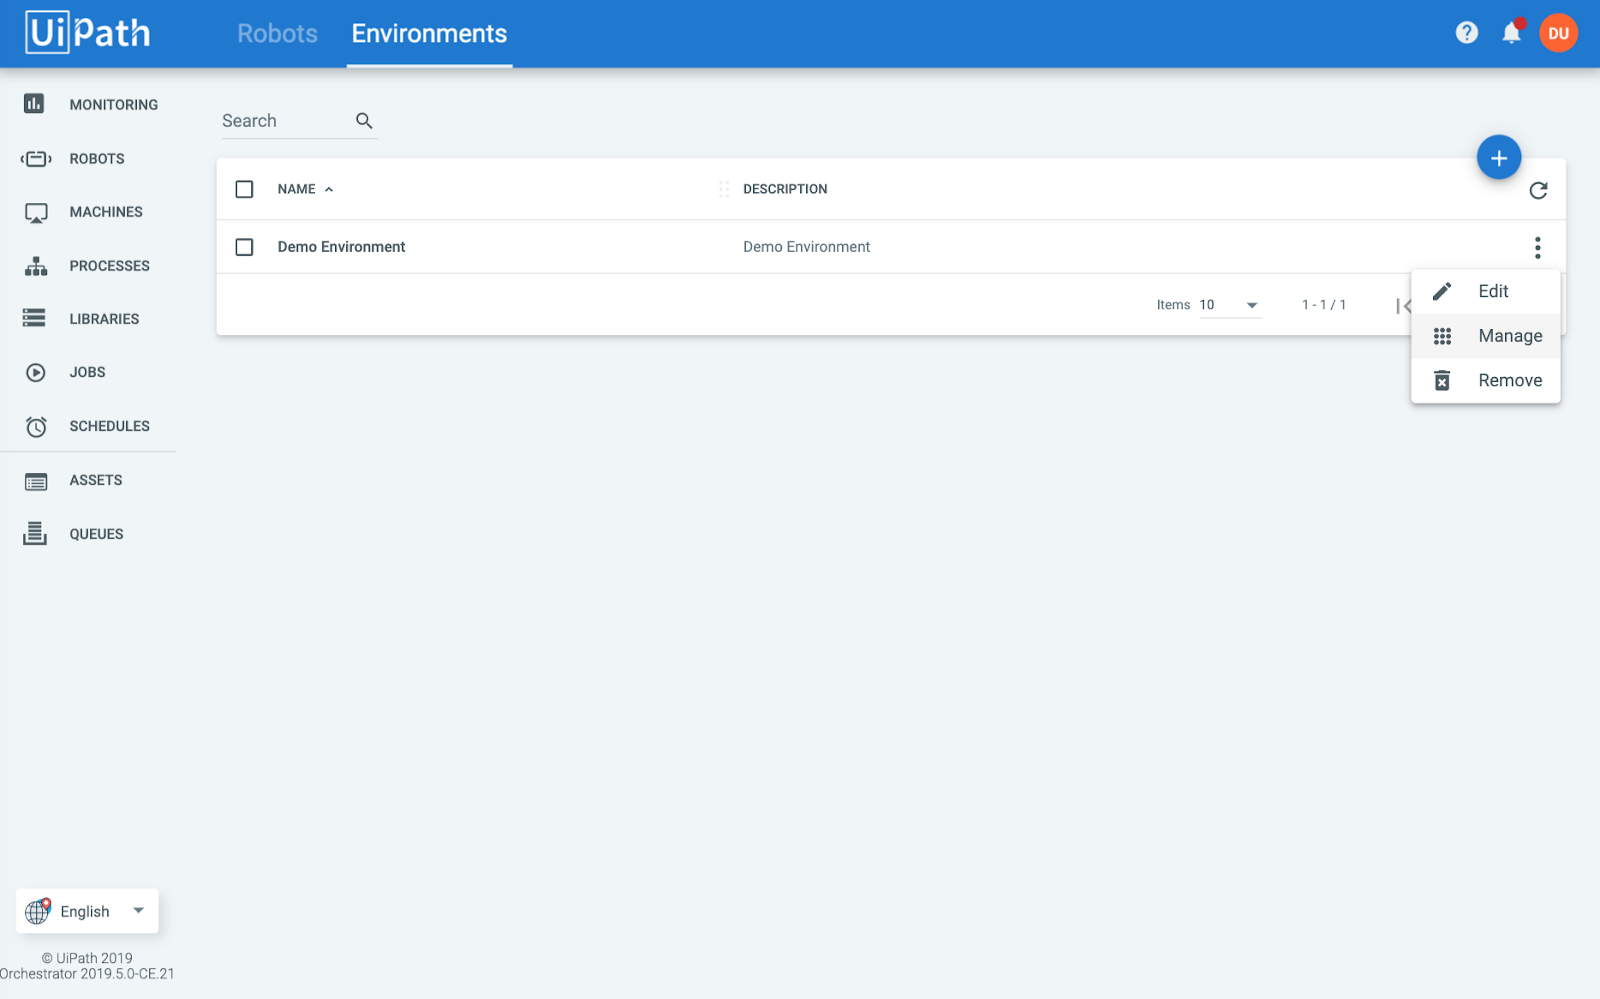
Step 7: Add Robot to Environment
Next, we’ll need to add the created Robot to the Environment. Select the Environments tab at the top of the Robots menu and select the Manage option.
Select the previously created robot and click UPDATE.
At this point, the robot should be successfully connected to the machine. Check the UiPath Robot Orchestrator Settings and the status should show “Connected, licensed”
Step 8: Start a Job
Now that the robot is deployed, it’s time to start a job to test it.
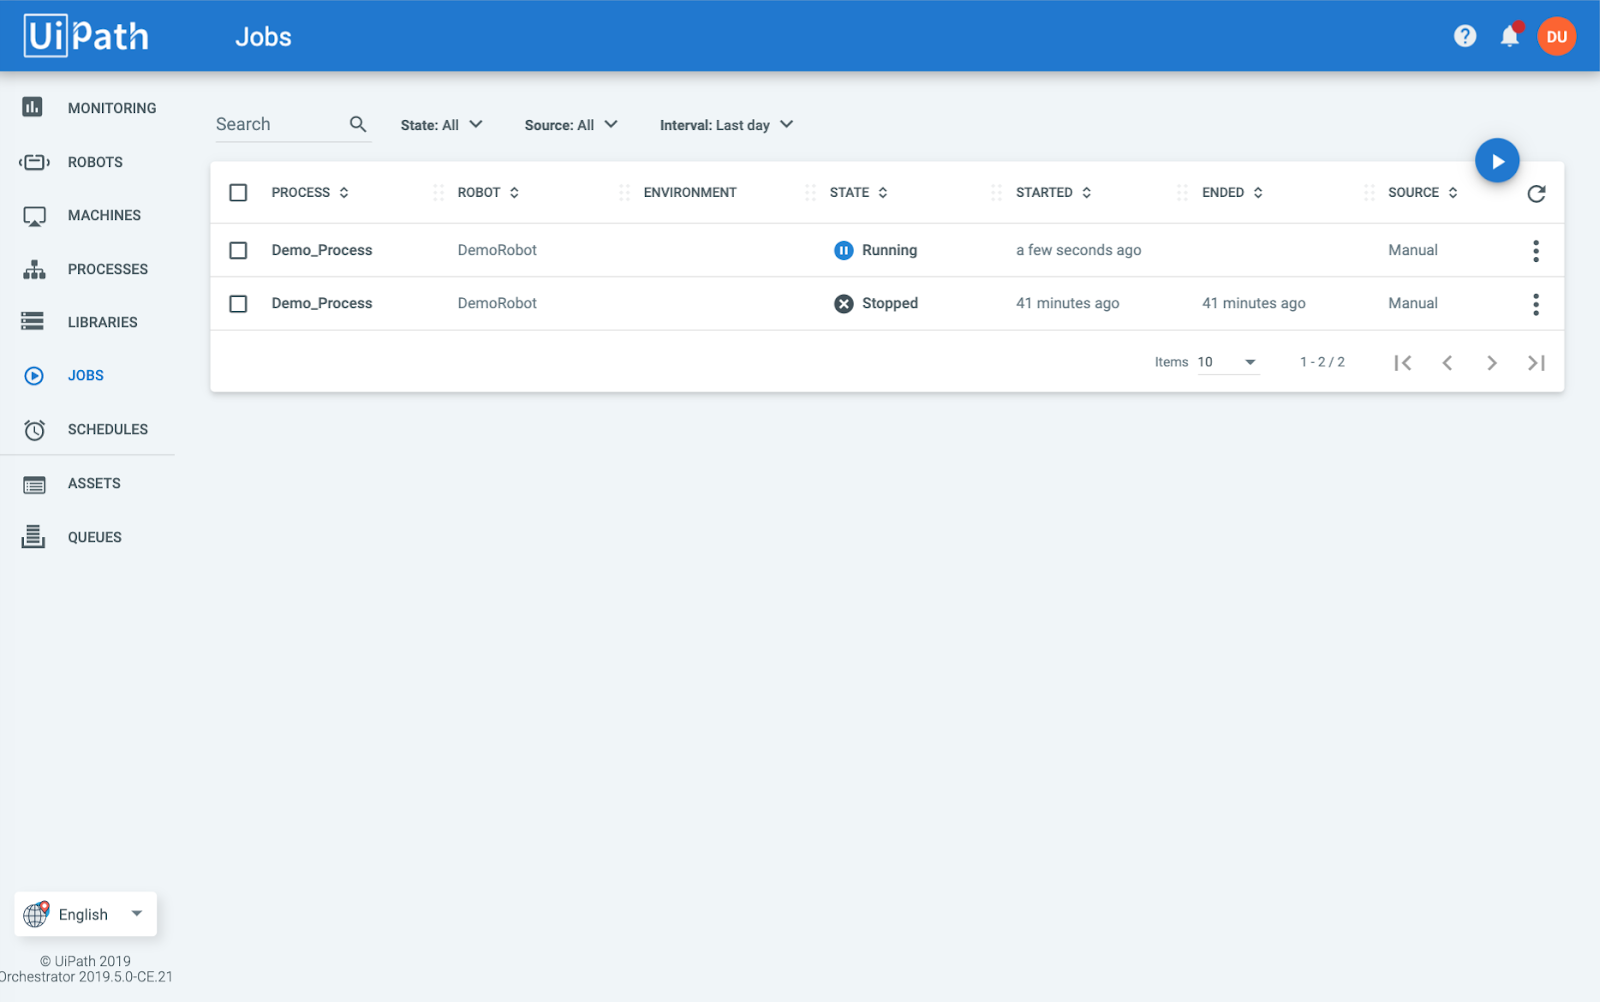
Under Jobs, click on the Play icon on the top right.
Select the pre-existing Demo Process and the previously robot, then click on Start.
In the UiPath Robot, it will show “Installing package…”. Once the package has been installed, it will show “Job started processing” which means the process has started. In this demo process, a Hello popup dialog will appear.
The robot has successfully started the job. You can monitor the robots and jobs in the Monitoring menu in the UiPath Orchestrator.
Step 9: Prepare for UiPath Integration
In June 2019, UiPath introduced a new mechanism for consuming its Cloud APIs. There are a number of steps required to retrieve some required information for integration:
1. Get Access and ID Tokens
1.1 Generate Code Challenge and Code Verifier
In a web browser, visit https://repl.it/languages/nodejs and run the following code:
function base64URLEncode(str) {
  return str.toString('base64')
    .replace(/\+/g, '-')
    .replace(/\//g, '_')
    .replace(/=/g, '');
}

function sha256(buffer) {
  return crypto.createHash('sha256').update(buffer).digest();
}

console.log("Generating challenge and Verifier");
var cryptoResult = crypto.randomBytes(32);
var verifier = base64URLEncode(cryptoResult);
var challenge = base64URLEncode(sha256(verifier));
console.log("Code challenge: " + challenge)
console.log("Code verifier: " + verifier);
Take note of the code challenge and code verifier values in the output e.g.
Generating challenge and Verifier
Code challenge: RzYlHiiGzPGgOLaRQJYftZ1mmc3sCbeicZVRftTmC-A
Code verifier: YVMnLczXQgJ9dwzV7MlMWEjGyAia4nXvTZzU4UVrAPE
1.2 Get Authorization Code
Replace the code challenge into the URL below, and visit the updated URL in a browser.
https://account.uipath.com/authorize?response_type=code&nonce=b0f368cbc59c6b99ccc8e9b66a30b4a6&state=47441df4d0f0a89da08d43b6dfdc4be2&code_challenge=[code_challenge]&code_challenge_method=S256&scope=openid+profile+offline_access+email &audience=https%3A%2F%2Forchestrator.cloud.uipath.com&client_id=5v7PmPJL6FOGu6RB8I1Y4adLBhIwovQN&redirect_uri=https%3A%2F%2Faccount.uipath.com%2Fmobile
The browser should redirect to
https://account.uipath.com/mobile?code=[authorization_code]&state=47441df4d0f0a89da08d43b6dfdc4be2
Copy the authorization_code in the URL.
1.3 Get Refresh Token
Using any API testing tool (e.g. Postman), submit a POST request to
https://account.uipath.com/oauth/token with the body below, replacing the values for [authorization_code] and [code_verifier] accordingly.
{
    "grant_type": "authorization_code",
    "code": "[authorization_code]",
    "redirect_uri": "https://account.uipath.com/mobile",
    "code_verifier": "[code_verifier]",
    "client_id": "5v7PmPJL6FOGu6RB8I1Y4adLBhIwovQN"
}
Copy the value of the refresh_token from the response:
{
    "access_token": "eyJ0eX...",
    "refresh_token": "CBZcOD6vrP2FQ9qa8fuqDdfoEwnVPuR2Kp...",
    "id_token": "eyJ0eX...",
    "scope": "openid profile email offline_access",
    "expires_in": 86400,
    "token_type": "Bearer"
}
1.4 Get Access Token and ID using the Refresh Token
Using any API testing tool, submit a POST request to
https://account.uipath.com/oauth/token with the body below, replacing the values for [refresh_token] accordingly.
{
    "grant_type": "refresh_token",
    "client_id": "5v7PmPJL6FOGu6RB8I1Y4adLBhIwovQN",
    "refresh_token": "CBZcOD6vrP2FQ9qa8fuqDdfoEwnVPuR2Kpz-hitbTAIzG"
}
Copy the values for access_token and id_token from the response.
{
    "access_token": "eyJ0eX...",
    "id_token": "eyJ0eX...",
    "scope": "openid profile email offline_access",
    "expires_in": 86400,
    "token_type": "Bearer"
}
2. Get UiPath Account, Service and Process Identifiers
2.1 Get the Account Logical Name
Using any API testing tool, submit a GET request to
https://platform.uipath.com/cloudrpa/api/getAccountsForUser with a request header
Authorization: Bearer [id_token]Copy the value for accountLogicalName from the response:
{
    "userEmail": "demo@domain.com",
    "accounts": [
        {
            "accountName": "Demo",
            "accountLogicalName": "Demo"
        }
    ]
}
2.2 Get Service Instance Logical Name
Using any API testing tool, submit a GET request to
https://platform.uipath.com/cloudrpa/api/account/[accountLogicalName]/getAllServiceInstances with a request header
Authorization: Bearer [id_token]
Copy the value for serviceInstanceLogicalName from the response:
[
    {
        "serviceInstanceName": "DemoDefault",
        "serviceInstanceLogicalName": "DemoDefaultzous50676",
        "serviceType": "ORCHESTRATOR",
        "serviceUrl": "https://platform-community.azurewebsites.net"
    }
]
2.3 Get Release Key for the Desired Process
We will now need to retrieve the Release Key, a unique identifier for a desired process. Using any API testing tool, submit a GET request to
https://platform.uipath.com/odata/Releases with request headers
Authorization: Bearer [access_token]
X-UIPATH-TenantName: [serviceInstanceLogicalName]
Copy the value for Key from the response:
{
    "@odata.context": "https://platform.uipath.com/odata/$metadata#Releases",
    "@odata.count": 1,
    "value": [
        {
            "Key": "b27c7363-459c-4520-bae5-660d4a1d3813",
            "ProcessKey": "Demo_Process",
            "ProcessVersion": "1.0.21",
            "IsLatestVersion": false,
            "IsProcessDeleted": false,
            "Description": "Demo Process",
            "Name": "Demo Process",
            "EnvironmentId": 98069,
            "EnvironmentName": "Demo Environment",
            "InputArguments": null,
            "QueueDefinitionId": null,
            "QueueDefinitionName": null,
            "Id": 120897,
            "Arguments": {
                "Input": null,
                "Output": null
            },
            "ProcessSettings": null
        }
    ]
}
2.4 Test Orchestrator API Call to Start a Job
At this point, make sure you have the following critical information at hand:
- refresh_token (Refresh Token)
- access_token (Access Token)
- serviceInstanceLogicalName (Service Instance Logical Name)
- Key (Release Key)
Let’s try making an API call to start a job for the process.
Using any API testing tool, submit a POST request to
https://platform.uipath.com/odata/Jobs/UiPath.Server.Configuration.OData.StartJobs with 2 request headers
Authorization: Bearer [access_token]
X-UIPATH-TenantName: [serviceInstanceLogicalName]
and the body:
{
    "startInfo":
   { "ReleaseKey": "b27c7363-459c-4520-bae5-660d4a1d3813",
     "Strategy": "All",
     "RobotIds": [ ],
     "JobsCount": 0,
     "Source": "Manual"
   }
}
If successful, the response will be as follows, with the status of the Job shown in the State attribute:
{
    "@odata.context": "https://platform.uipath.com/odata/$metadata#Jobs",
    "value": [
        {
            "Key": "e811bd29-26fb-4cc3-af91-7fd6308ca643",
            "StartTime": null,
            "EndTime": null,
            "State": "Pending",
            "Source": "Manual",
            "SourceType": "Manual",
            "BatchExecutionKey": "382e7a96-a5b9-4343-b258-26a80cf87f80",
            "Info": null,
            "CreationTime": "2019-06-12T08:02:03.2595408Z",
            "StartingScheduleId": null,
            "ReleaseName": "Demo Process",
            "Type": "Unattended",
            "InputArguments": null,
            "OutputArguments": null,
            "HostMachineName": null,
            "HasMediaRecorded": false,
            "Id": 10169582
        }
    ]
}
Tutorial Part 2: Get Started with Joget
Joget Overview
Joget is an open source no-code/low-code application platform for faster, simpler digital transformation. Joget combines the best of business process automation, workflow management and rapid application development in a simple, flexible and open platform. Visual and web-based, it empowers non-coders to instantly build and maintain apps anytime, anywhere.
 |
| Joget Platform Architecture |
Sign Up for Joget Workflow On-Demand
If you already have your own installation of the Joget platform, you can use it and skip this step. Otherwise, you can sign up for Joget Workflow On-Demand, a hosted version of the Joget platform that allows you to quickly get started.
Visit https://cloud.joget.com and click on Sign Up Free to register a new account.
Once you have successfully verified your email, you will be linked to your own running installation of Joget Workflow where you’ll be able to visually build a full app in 30 minutes without coding.
Tutorial Part 3: Integrate UiPath with Joget
How to Integrate with UiPath
UiPath provides the Orchestrator API for integration.
The most commonly used function is Starting a Job, which should satisfy a majority of use cases. We will use this function in the following integration tutorial.
Design a Joget Process to Start a UiPath Job
Since the UiPath Orchestrator API is a REST API with data in JSON format, we can use the Joget JSON Tool to invoke the API.
Before we start, ensure that you have the following critical UiPath information at hand (obtained from the previous Prepare for UiPath Integration tutorial):
- refresh_token (Refresh Token)
- serviceInstanceLogicalName (Service Instance Logical Name)
- Key (Release Key)
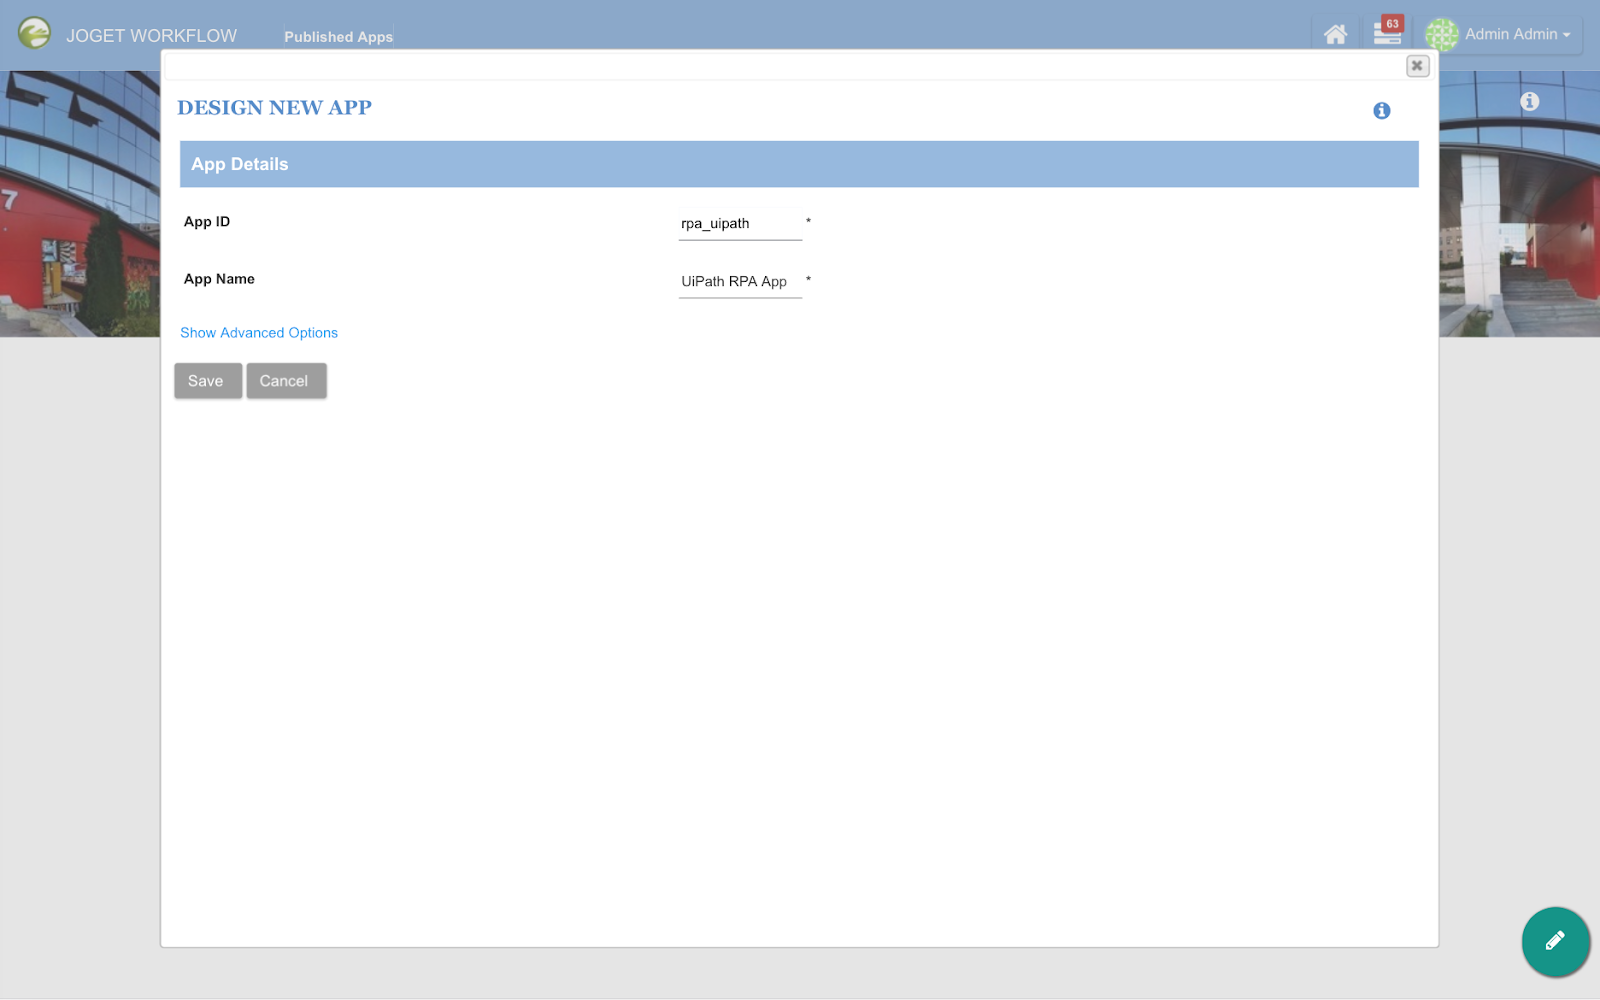
Step 1. Design New App
First, let’s design a new app by clicking on Design New App in the Joget App Center.
Fill in desired values for the App ID and App Name, and click Save.
Step 2. Design New Process
Click on the Processes menu, then on the Design Process button to launch the Process Builder.
Design a simple process containing 2 tools, as shown below.
Click on the edit pencil icon after hovering over the process name along the top. Enter a suitable process name and create 3 workflow variables to store the response values from UiPath API call:
- status
- id_token
- access_token
Click on Deploy.
Step 3. Configure First Tool to Get UiPath Access Token
Once the process has been deployed, close the Process Builder. In the process view page, select the Map Tools to Plugins tab.
Click on Configure Plugin for the first tool and select JSON Tool, then key in the following configuration:
JSON URL
| |
Call Type
|
POST
|
POST Method
|
Custom JSON Payload
|
Custom JSON Payload
|
{
"grant_type": "refresh_token",
"client_id": "5v7PmPJL6FOGu6RB8I1Y4adLBhIwovQN",
"refresh_token": "[refresh_token]"
}
|
Under Store to Workflow Variable, map the variables to store the tokens in the matching workflow variables i.e.
access_token
|
access_token
|
id_token
|
id_token
|
Click on Submit to save.
Step 4. Configure Second Tool to Start Job Using the Access Token
Click on Configure Plugin for the second tool and select JSON Tool, then key in the following configuration:
JSON URL
| |
Call Type
|
POST
|
POST Method
|
Custom JSON Payload
|
Custom JSON Payload
|
{ "startInfo":
{ "ReleaseKey": "[Key]",
"Strategy": "All",
"RobotIds": [ ],
"JobsCount": 0,
"Source": "Manual"
}
}
|
Request Headers
|
Authorization: Bearer #variable.access_token#
X-UIPATH-TenantName: [serviceInstanceLogicalName]
|
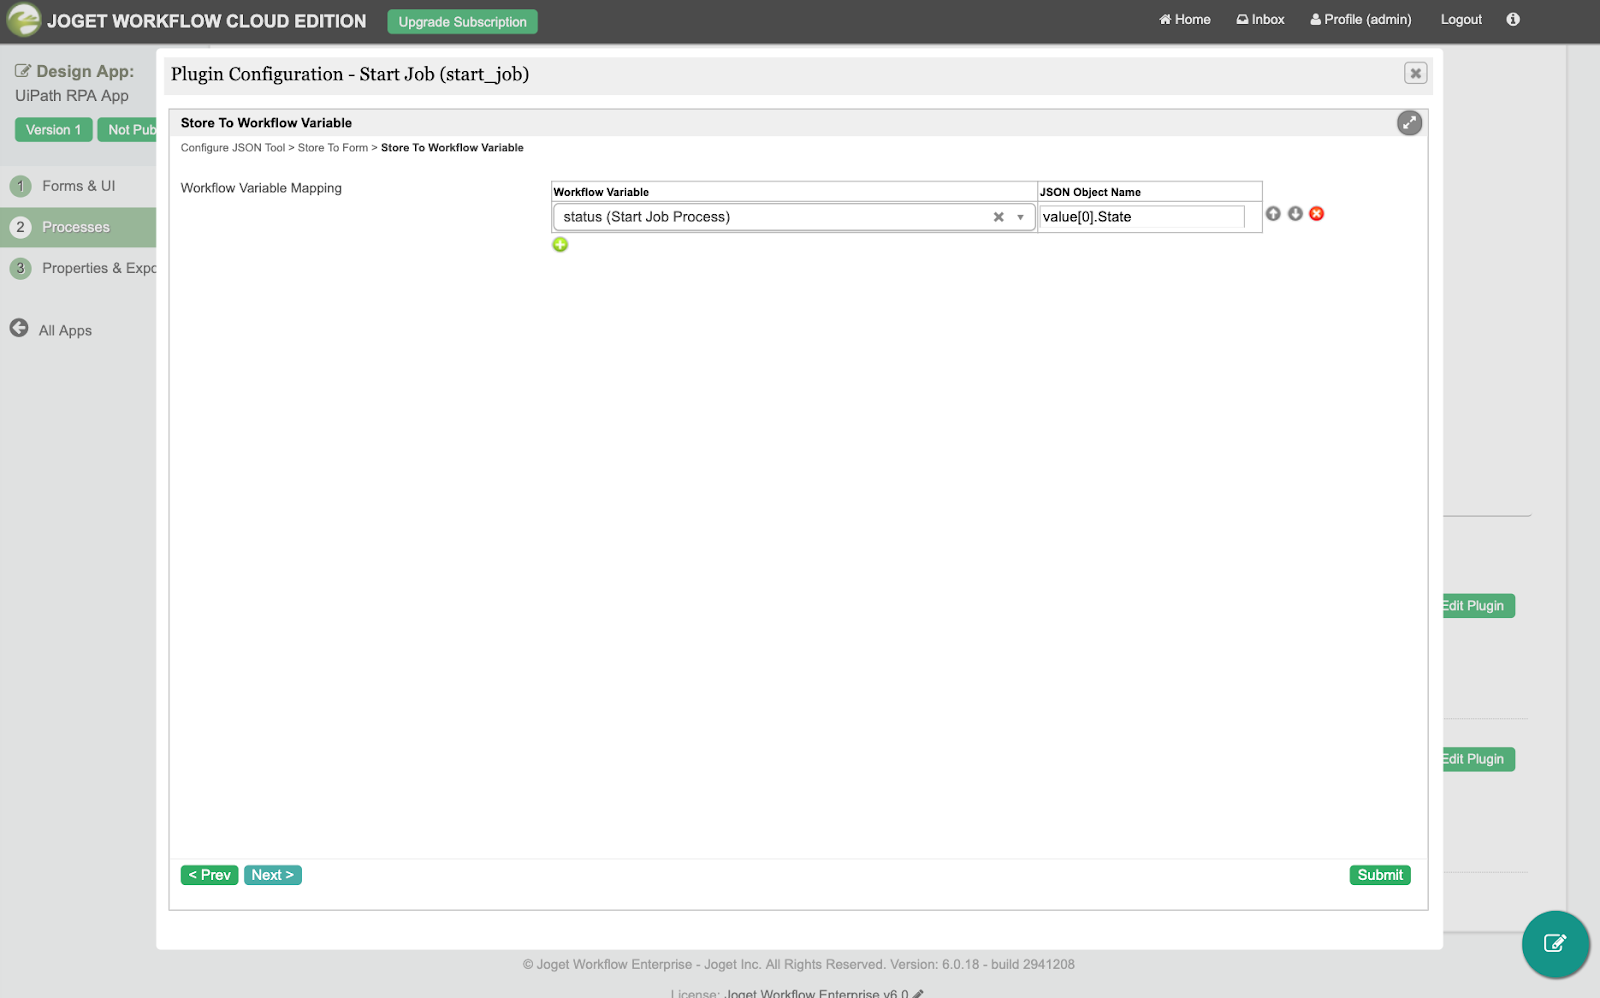
Under Store to Workflow Variable, map the status variable to the State attribute in the response JSON i.e.
status
|
value[0].State
|
That’s it. The Joget process has been configured to invoke the UiPath Orchestrator API to start a job.
Step 5. Run the Process
Now, let’s test the process. Click on the Run Process button at the top, then Run Process again in the confirmation dialog.
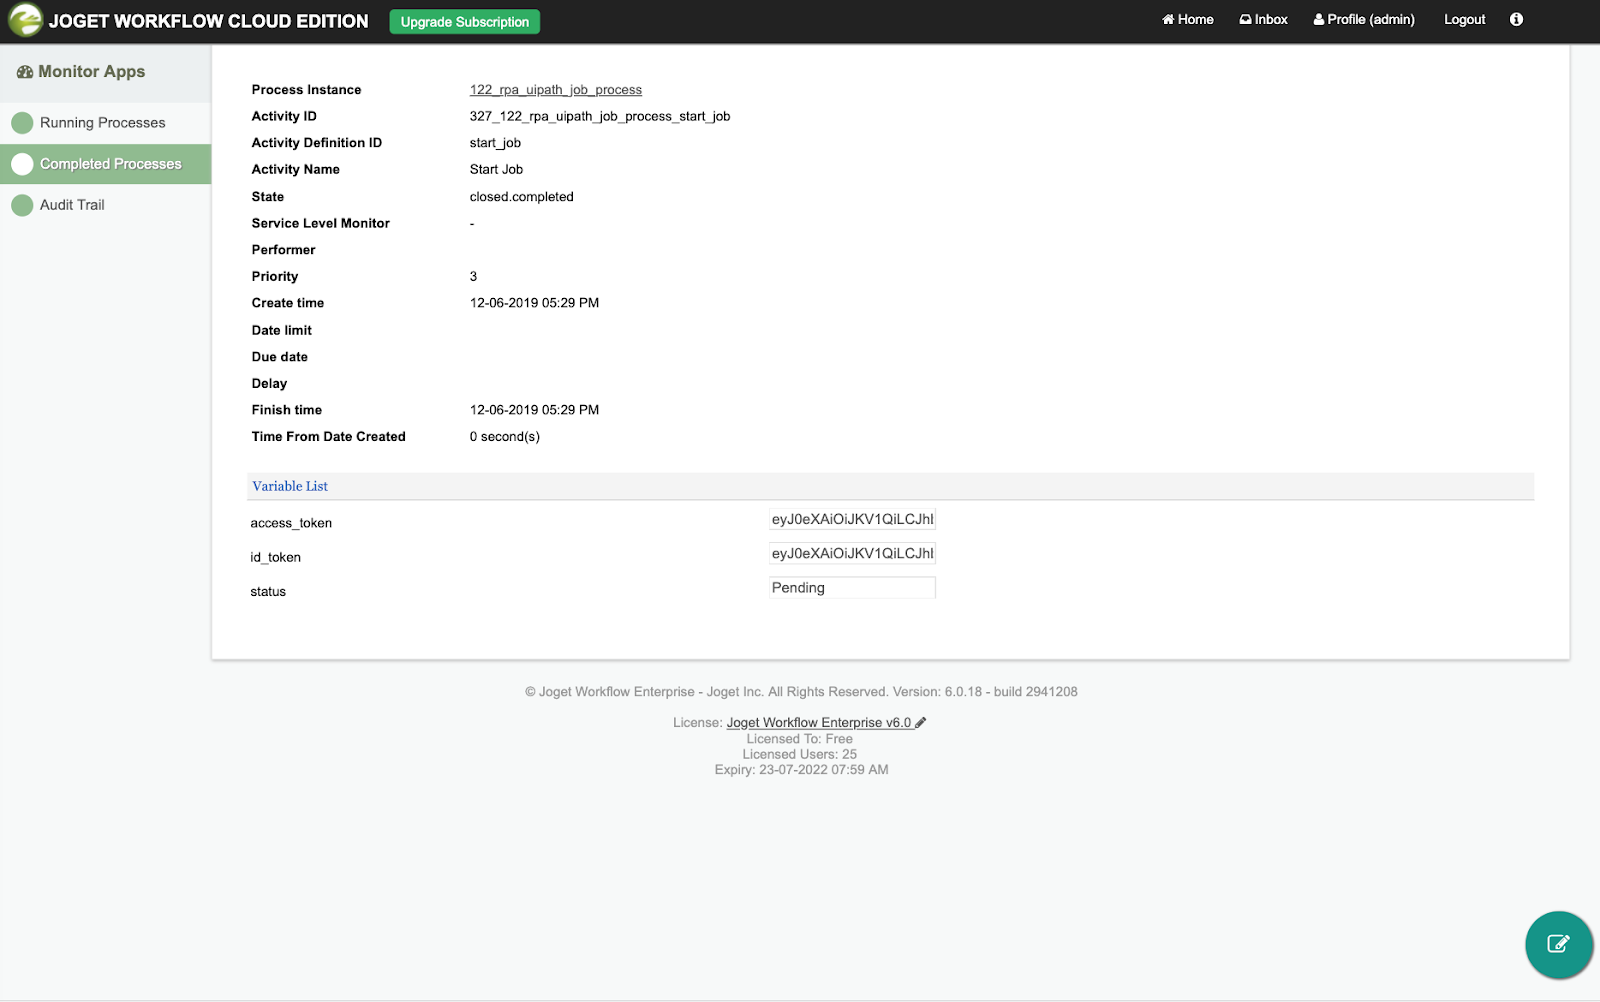
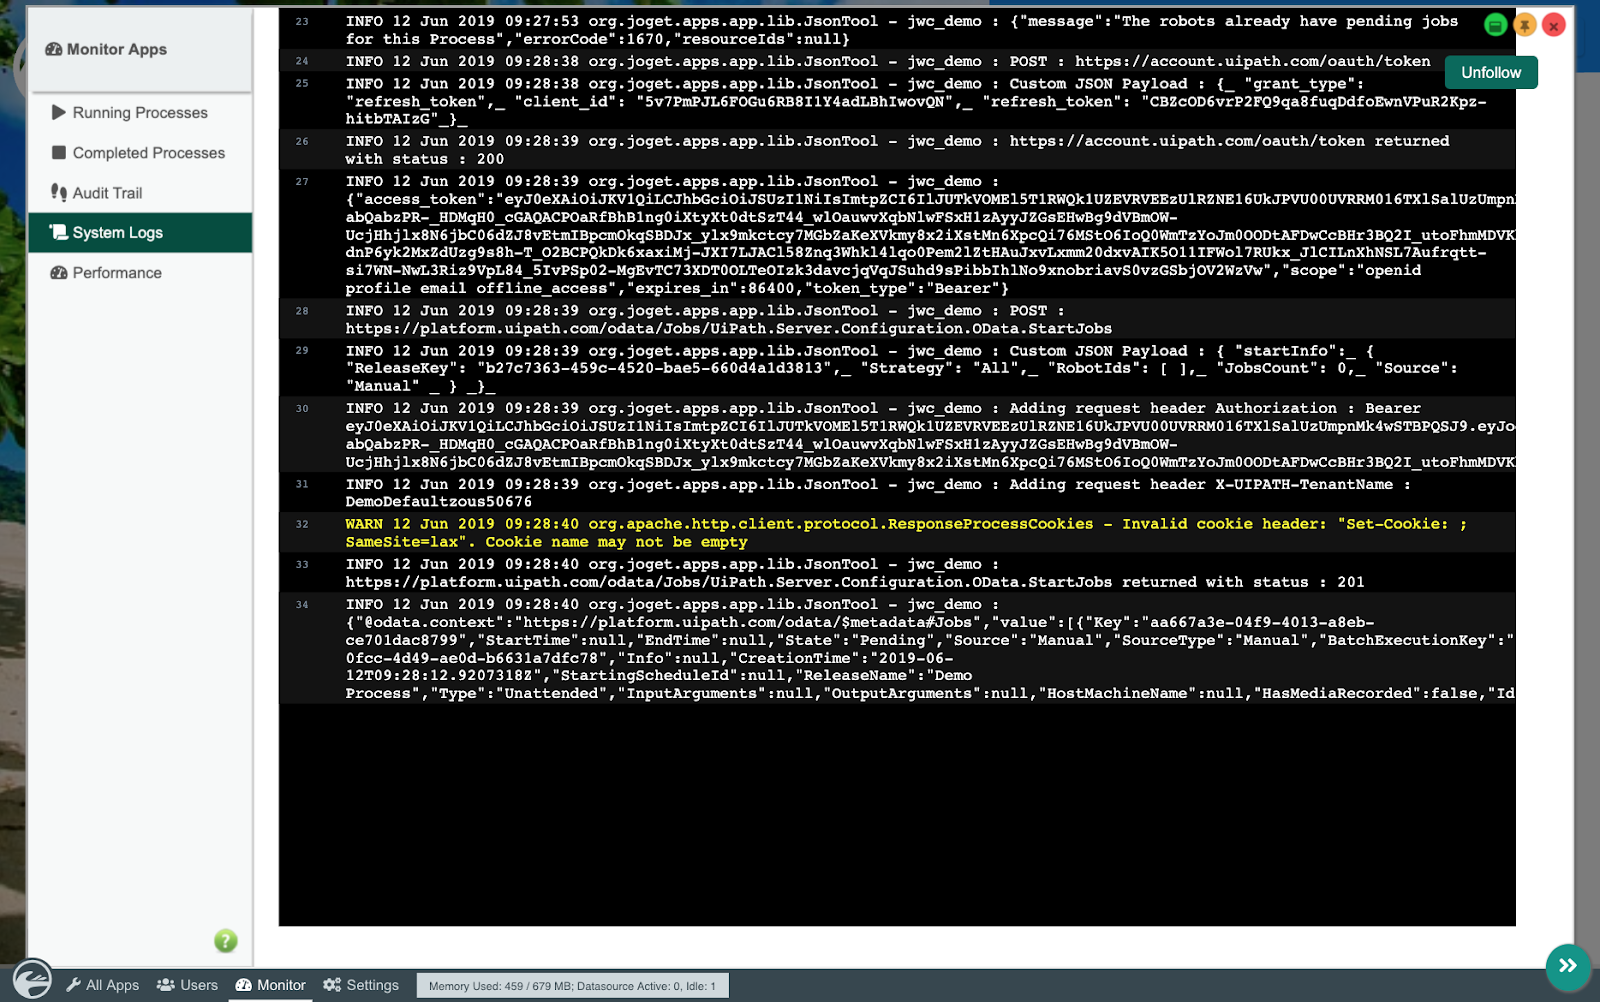
Once the process has started, the 2 tools will execute as configured. To view the results of the process, navigate to Monitor -> Completed Processes.
Select the process instance and you will see the 2 tools executed.
Click on each activity to view the values of the workflow variables which obtained the results of the Orchestrator API calls.
If you are running Joget on-premise and have access to the system logs, you will be able to see the tool requests and responses if the debugging option is enabled. If you are using Joget DX, you can stream the logs directly in the web browser.
Back at the UiPath Orchestrator and UiPath Robot, you would also be able to monitor the execution of the job.
Conclusion
In this article we introduced Robotic Process Automation (RPA) and its benefits. We also explained how RPA and low-code application platforms complement each other, whereby low-code apps are used to rapidly build new apps for process reengineering while working with RPA to integrate with legacy and external systems.
We then covered a tutorial on getting started with UiPath and Joget, followed by a tutorial on integration between them. As demonstrated in the tutorial, a lot of the work required for integration is in preparing the authentication mechanism to the UiPath Orchestrator API. Once the required integration keys are available, the configuration in Joget to invoke the UiPath API itself is pretty simple.
To learn more about each of the platforms, visit UiPath and Joget.


Thanks, Very nice blog, and articles. I am really very happy to visit your blog. Now I am found what I actually want. I try to learn something from your blog. Thank you for sharing such great information with us and waiting for your new post
ReplyDelete