Coding for Non-Coders: How to Easily Build Enterprise Apps Without Coding in 8 Simple Steps
A few years ago, it wasn't entirely practicable for non-coders to build applications due to the difficulties and technicalities of coding. In fact, coding wasn't something to discuss in the average workplace except by IT.
However, technology has changed a lot of things on the app development front and it's now not just practical but also easy for non-developers to create working apps through codeless development, as we've discussed in parts one and two of this series.
Today, we will show you, in eight simple steps, exactly how to create enterprise web applications for your organization, using the Joget platform as our primary tool.
For the fact that this post targets non-technicals, we'll try to keep it free from technical jargons as much as we can while still delivering value. And where we use a technical term, we'll explain it. Let's go straight up into the steps:
STEP #1: IDEATE WHAT APP TO CREATE
Ideation is the starting point into every new project, right? Sure! So the first thing you'll need to do in creating your enterprise application is to develop an idea of what app to build.

This is where you have to define the purpose and mission of your app, its core appeal, and where it fits into the organization's overall strategy.
When it comes to ideation, you have to be very strategic, otherwise, you may end up struggling with the adoption of the app by users. Put differently, it's not just any idea that works.
For your app to carry a lot of weight with users, it should aim at solving a real-world problem for your organization. It could be efficiency problem, process problem, or just any effective organizational problem that needs solving.
Usually, these sort of problems are always almost everywhere in an organization; so you might not need to look too far. Whatever idea you arrive at, it should generally do at least one of the following:
- Simplify complex business processes
- Reduce costs
- Save time
- Make employees’ jobs easier
- Enhance effective collaboration
- Allow secure access to information
- Resolve efficiency issues
- Make it possible for employees to continue working outside of the traditional office
- Streamline and improve workflow and approval processes
- Amplify opportunities for the organization
- And more.
To develop even a more feasible idea, consider involving potential users (employees). Ask questions and get them to contribute ideas. Talking to prospective participants helps you validate your idea, which is important for an app to be successful.
STEP #2: DETERMINE AND DETAIL FUNCTIONALITIES AND FEATURES OF THE APP
After you've identified a need within the organization and aligned your app idea accordingly to resolve it, it's time to solidify things by properly detailing what should go into the app.

At this stage, you might want to make a list of all the major features and also research the functionalities you'd love in the app. You can brainstorm with your team and ask them what to expect.
STEP #2: DETERMINE AND DETAIL FUNCTIONALITIES AND FEATURES OF THE APP
After you've identified a need within the organization and aligned your app idea accordingly to resolve it, it's time to solidify things by properly detailing what should go into the app.
At this stage, you might want to make a list of all the major features and also research the functionalities you'd love in the app. You can brainstorm with your team and ask them what to expect.
By detailing things down, you will be able to:
STEP #3: CHOOSE YOUR TOOL AND SIGN UP
By now, you have your app’s use cases outlined and a mental picture of its structure. The next step is to choose an app builder platform to create your app.
Of course, we’re discussing codeless development here so the tool you choose should definitely be a no-code/low-code platform with which you can easily build apps with little or zero coding knowledge.

In our bias, we recommend Joget Workflow as your go-to development platform. It can save you tens of thousands of dollars.
STEP #4: CREATE YOUR APP
With your app idea birthed, the feature set mapped out, and the functionalities defined, it’s time to further establish your project by connecting and fusing these individual pieces together.
From step #1 up to step #3, you've been preparing for the main job. Now, it's time to actually create your app. This step is probably the most technical part of this whole process, so you need to pay special attention to it.
And don't worry about the intricacies involved with development; codeless development is simple. It basically involves dragging and dropping visual elements to create what you want. Moreso, we will be using Joget Workflow, a really easy-to-use platform that makes development even enjoyable.
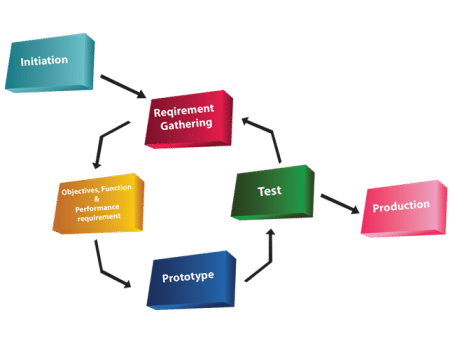
The first thing you would want to do in actually developing your enterprise application is to create a prototype of the app. The general idea of prototyping is to represent as close to the final product as possible, for testing.
You can use Joget Workflow to create a working and fully functioning prototype, where users can actually use the system. This way, you get the users to participate directly and they can see what they are getting from the onset.
To prototype with Joget Workflow, use the App Generator. With it, you’d be able to generate a fully functioning prototype from a form. Here’s a helpful tutorial on how to use the App Generator.
Understand that not all enterprise web applications require prototyping, especially simple and small apps. But for big apps, it's smart to create and test prototypes.
After you've created and tested a prototype of your app, and are satisfied with it, it's time to create the full application.
Creating a Joget Workflow app typically involves five simple steps as shown below:
1. DESIGNING A NEW APP
- Give your idea a structure
- Ensure each use case makes sense in reality
- Pre-design the user experience for better delivery
- Arrange features beforehand and map out the priority of your app’s content
- Connect the dots from one element to another.
STEP #3: CHOOSE YOUR TOOL AND SIGN UP
By now, you have your app’s use cases outlined and a mental picture of its structure. The next step is to choose an app builder platform to create your app.
Of course, we’re discussing codeless development here so the tool you choose should definitely be a no-code/low-code platform with which you can easily build apps with little or zero coding knowledge.
In our bias, we recommend Joget Workflow as your go-to development platform. It can save you tens of thousands of dollars.
STEP #4: CREATE YOUR APP
With your app idea birthed, the feature set mapped out, and the functionalities defined, it’s time to further establish your project by connecting and fusing these individual pieces together.
From step #1 up to step #3, you've been preparing for the main job. Now, it's time to actually create your app. This step is probably the most technical part of this whole process, so you need to pay special attention to it.
And don't worry about the intricacies involved with development; codeless development is simple. It basically involves dragging and dropping visual elements to create what you want. Moreso, we will be using Joget Workflow, a really easy-to-use platform that makes development even enjoyable.
The first thing you would want to do in actually developing your enterprise application is to create a prototype of the app. The general idea of prototyping is to represent as close to the final product as possible, for testing.
You can use Joget Workflow to create a working and fully functioning prototype, where users can actually use the system. This way, you get the users to participate directly and they can see what they are getting from the onset.
To prototype with Joget Workflow, use the App Generator. With it, you’d be able to generate a fully functioning prototype from a form. Here’s a helpful tutorial on how to use the App Generator.
Understand that not all enterprise web applications require prototyping, especially simple and small apps. But for big apps, it's smart to create and test prototypes.
After you've created and tested a prototype of your app, and are satisfied with it, it's time to create the full application.
Creating a Joget Workflow app typically involves five simple steps as shown below:
1. DESIGNING A NEW APP
This is the step which starts the build process.
Here, you're required to enter the details of your new app, including App ID (without spaces) and App Name.
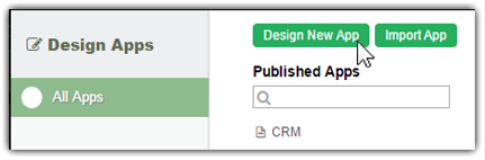
For step-by-step instructions on designing a new app, see this tutorial.
2. DESIGNING A FORM
In this step, you're to design a new form for your app using Joget's Form Builder. You will be required to enter a Form ID, Form Name, and Form Table.
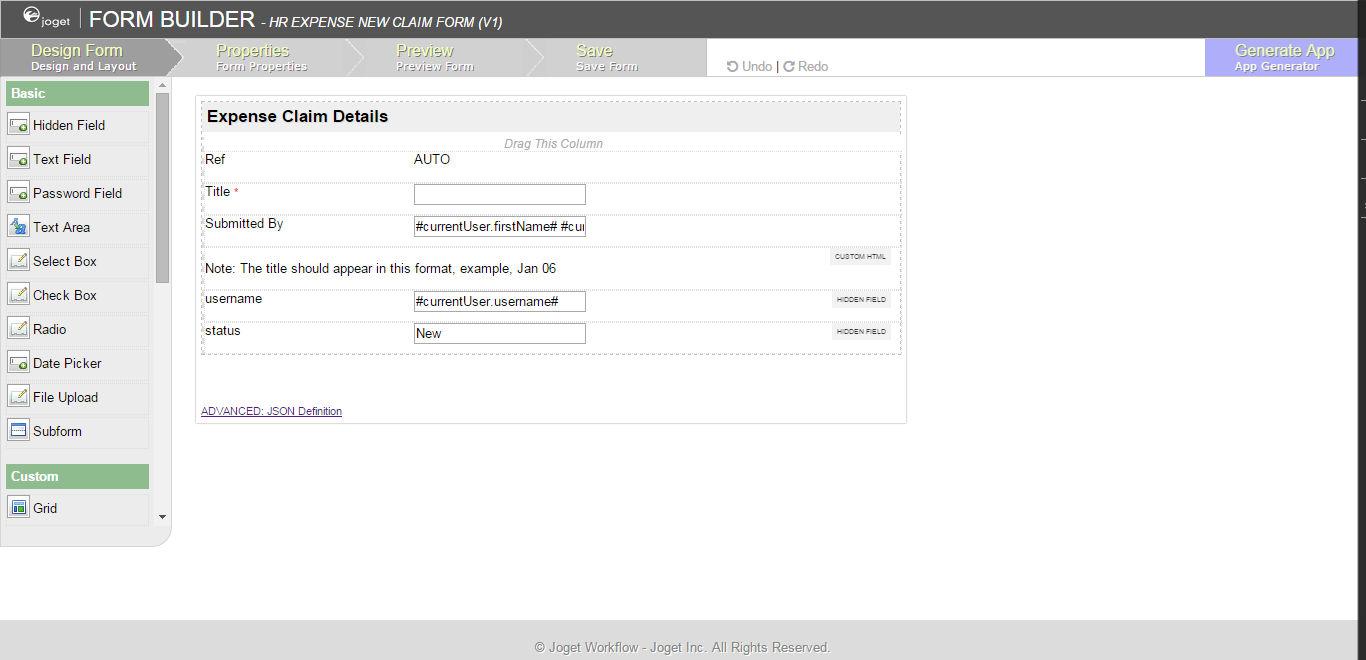
Follow the instructions in this tutorial for a detailed guide on designing a form.
3. DESIGNING A LIST
Here, you're required to enter the details of your new app, including App ID (without spaces) and App Name.
For step-by-step instructions on designing a new app, see this tutorial.
2. DESIGNING A FORM
In this step, you're to design a new form for your app using Joget's Form Builder. You will be required to enter a Form ID, Form Name, and Form Table.
Follow the instructions in this tutorial for a detailed guide on designing a form.
3. DESIGNING A LIST
The third step involves designing a list using Datalist Builder.
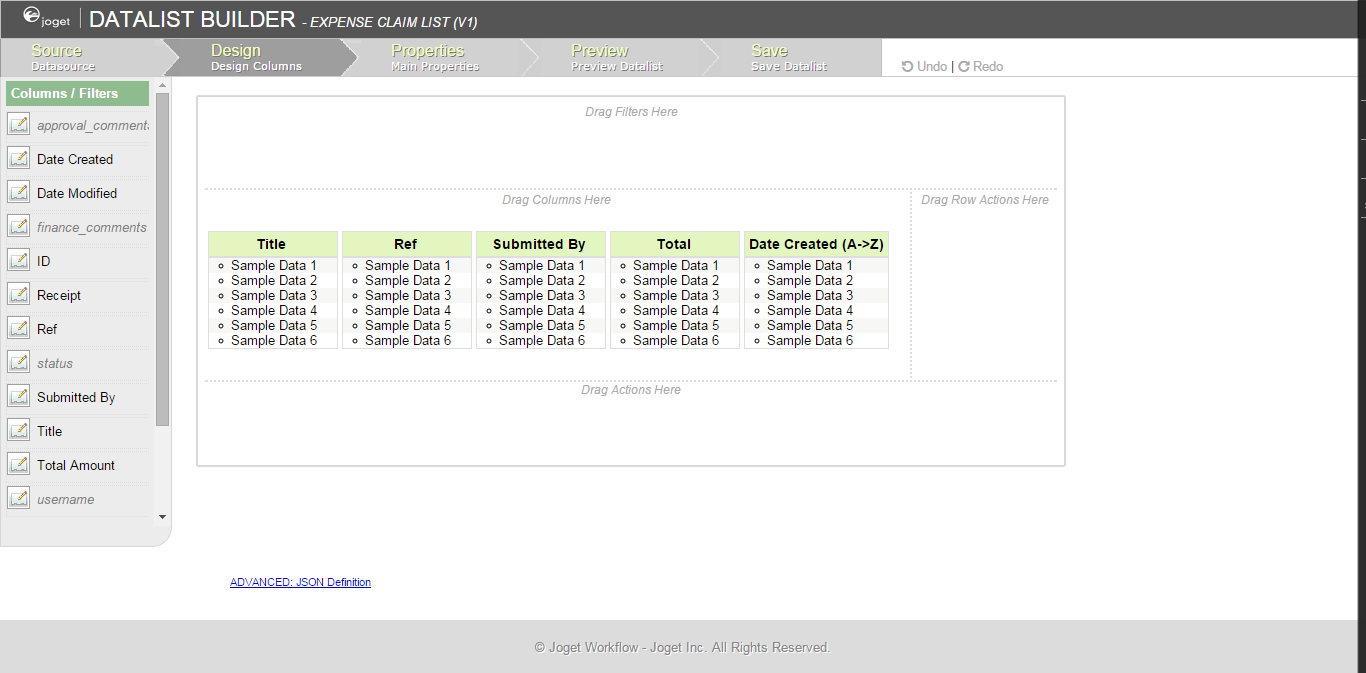
This is where you get to create a list of cumulative field values from all workflow process instances associated with the form.
This is where you get to create a list of cumulative field values from all workflow process instances associated with the form.
You'll need to select the source of the data, edit columns, plus a couple other functions.
Go here for details on designing a list.
4. DESIGNING A USERVIEW
Step four is where you get to design the front-end interface of your app using Userview Builder.
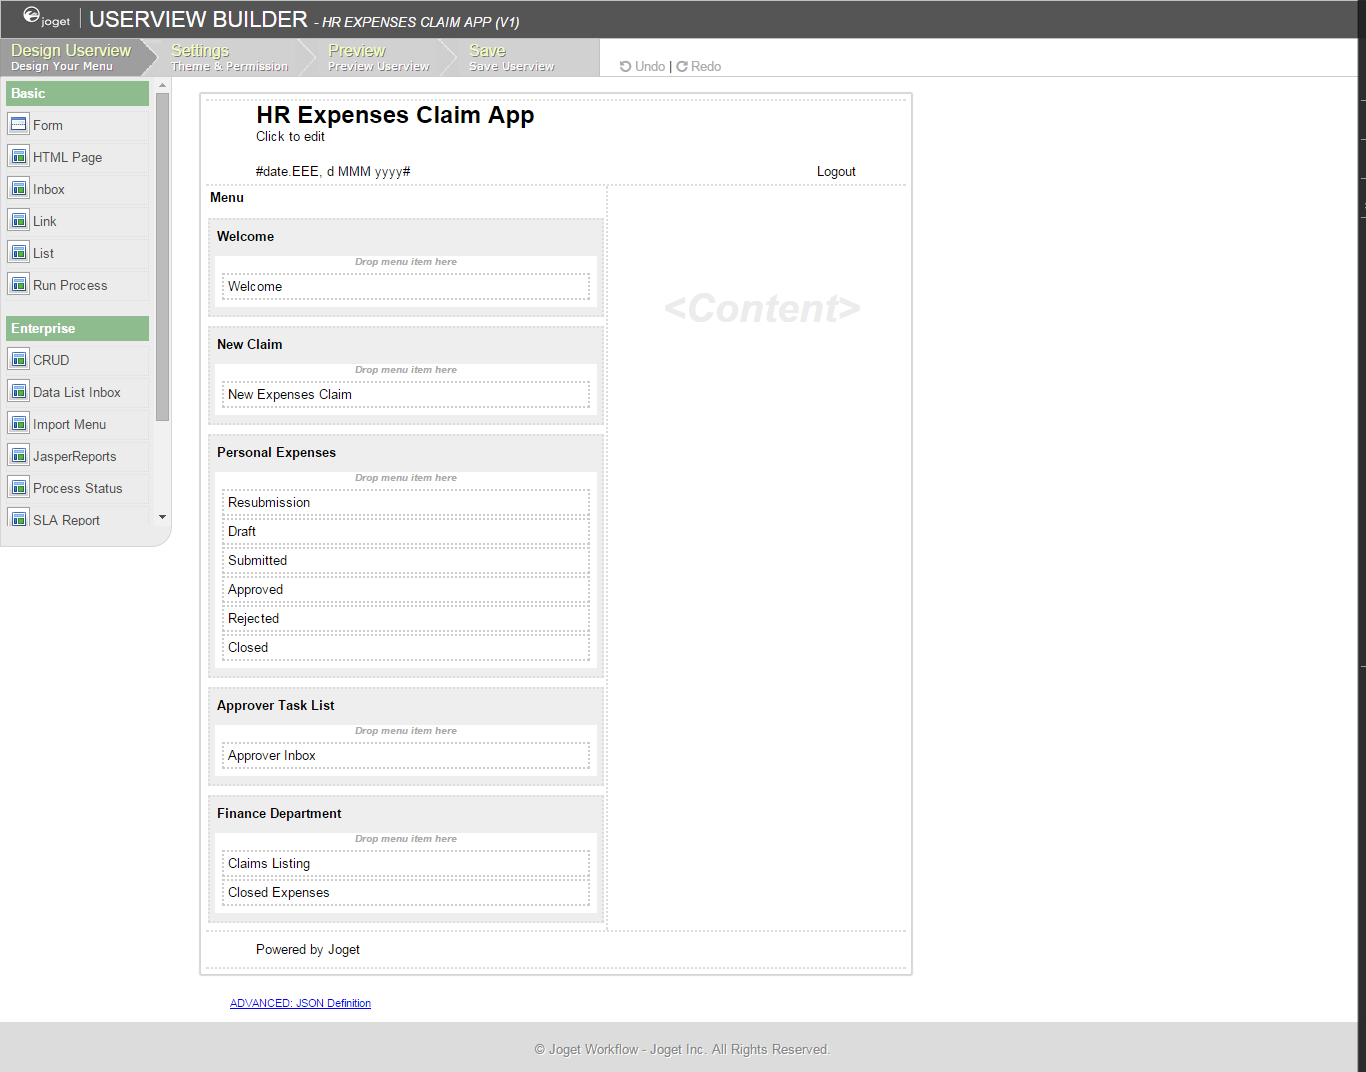
You can develop a theme from scratch but there's also a list of preloaded themes you can choose from for quicker development.
Here's a quick tutorial on designing a userview with Joget Workflow.
5. DESIGNING A PROCESS
Go here for details on designing a list.
4. DESIGNING A USERVIEW
Step four is where you get to design the front-end interface of your app using Userview Builder.
You can develop a theme from scratch but there's also a list of preloaded themes you can choose from for quicker development.
Here's a quick tutorial on designing a userview with Joget Workflow.
5. DESIGNING A PROCESS
The final step in creating a Joget Workflow app centers on process design. You can complete this step using Process Builder.

For help, check out this step-by-step process of designing a process.
For help, check out this step-by-step process of designing a process.
STEP #5: TEST IT… AGAIN
After you've created the full app, it's important you test it again. You will want to test the use cases, user interface, navigation, and individual screens to see if the experience is good enough.

All the components of your app should properly work at this point, and your app should be visually appealing as well.
STEP #6: INTEGRATE AND EXTEND YOUR APP
You may find it necessary to extend the functionalities of your app. For instance, you might want to extend an account payable workflow automation app to allow vendors to submit invoices directly to the AP department.
This can be done using plugins. Joget Workflow has a robust plugin architecture you can take advantage of to enhance and extend the functionalities of your app and integrate it with external technologies such as JSON, SOAP, and SQL/JDBC.
STEP #7: DEPLOY YOUR APP AND GET TARGET USERS TO ADOPT IT
So you now have a well-built app created and tested. Well, it's time to launch it.
App development does not end at just creating the app. It involves making sure the app gets adopted and used by the people. You wouldn't say you created a successful app if nobody is using it, would you?
We recommend you always get buy-in from potential users and other stakeholders even before creating the app. It's also intelligent to have adoption strategy.
STEP #8: GET FEEDBACK AND MAKE IMPROVEMENTS
Now that your app is in it’s fully functioning form, and with more users taking it for a spin, you may find that you need to make a couple of tweaks to bring it out fully.
Development is a process; it continues. Don't stop working on your app. Continually update and improve it based on user feedback and on new technologies.
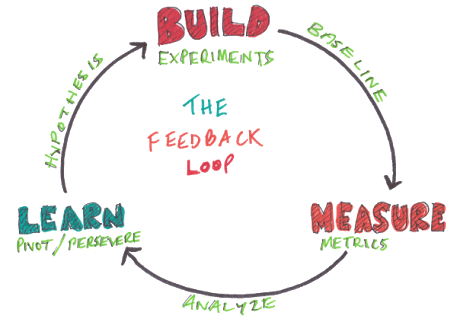
Keep an eye on engagement. Why? Because user behavior and interaction with your app will go a long way to giving you insight into the strengths and weaknesses of your app, giving you ideas on how to improve and enhance your app.
Also, be open to constructive criticism and listen to complaints. Work with the support team of your software provider to fix technically complex problems.
Building an app can be very easy, especially with the right tools and information in hand. You don't need to be a professional coder to do so, as codeless development has totally changed the game.
We hope you try out Joget Workflow, but you ought also to try out the steps given above to build something employees will be happy to use.
This is the part three of the series, Coding for Non-Coders. Feel free to check out parts one and two if you have yet to do so.


Comments
Post a Comment